In this tutorial, we will see how to capture screenshots on cross platforms using .Net MAUI. The name "Screenshots" indicates, the image that is the screen of our device allows us to capture the exact situation we want in the application when we use it.
Launch Visual Studio 2022, and in the start window click Create a new
project to create a new project.
In the Create a new project window, select MAUI in the All project types
drop-down, select the .NET MAUI App template, and click the Next button:
In the configure your new project window, name your project, choose a
suitable location for it, and click the Next button:
In the Additional information window, click the Create button:
Once the project is created, we can able to see the Android, iOS, Windows
and other running options in the toolbar. Press the emulator or run button
to build and run the app
Implementation:
To take a screenshot, .NET MAUI provides us with the IScreenshot interface which is exposed by the Screenshot.Default component in the Microsoft.Maui.Media namespace.
In Solution Explorer, click MainPage.xaml and replace the page content with what is shown below:
Open the MainPage.xaml.cs file and the page content as shown below:
IsCaptureSupported: Returns a bool value – Gets a value indicating whether
the capturing screenshots are supported.
CaptureAsync: Returns an ISscreenshotResult. – It is responsible for taking screenshots of the current application. Therefore, we can get various information about it, such as width and height.
Stream: IScreenshotResult also has a Stream property that is used to convert the screenshot to an image object.
Assign the derived stream value to the image control as ImageSource.
You can download the code from
GitHub. If you have
any doubts, feel free to post a comment. If you liked this article, and it is
useful to you, do like, share the article & star the repository on
GitHub.
October 16, 2022
In this tutorial series, we will see how to use animations in .NET Multi-platform App UI (.NET MAUI), this animation classes targ...
In this tutorial series, we will see how to use animations in .NET
Multi-platform App UI (.NET MAUI), this animation classes target different
properties of visual elements, with a typical introductory animation
progressively changing a property from one value to another over a period of
time.
Launch Visual Studio 2022, and in the start window click Create a new
project to create a new project.
In the Create a new project window, select MAUI in the All project types
drop-down, select the .NET MAUI App template, and click the Next button:
In the configure your new project window, name your project, choose a
suitable location for it, and click the Next button:
In the Additional information window, click the Create button:
Once the project is created, we can able to see the Android, iOS, Windows
and other running options in the toolbar. Press the emulator or run button
to build and run the app
Implementation:
Basic animations can be created with extension methods provided by the
ViewExtensions class, in the Microsoft.Maui.Controls namespace, which
operate on VisualElement objects.
In Solution Explorer, click on MainPage.xaml. Add Title="Main Page" to
ContentPage and replace the content of the page to what is shown below:
Open MainPage.xaml.cs file and the content of the page to what is shown
below:
.NET Multi-platform App UI (.NET MAUI) includes an Easing class that enables
you to specify a transfer function that controls how animations speed up or
slow down as they're running.
The animation extension methods in the ViewExtensions class allow an easing function to be specified as the final method argument:
You can download the code from
GitHub. If you have
any doubts, feel free to post a comment. If you liked this article, and it is
useful to you, do like, share the article & star the repository on
GitHub.
October 09, 2022
In this tutorial series, we will see how to use NavigationPage, which provides a hierarchical navigation experience to enable you to na...
In this tutorial series, we will see how to use NavigationPage, which provides a hierarchical navigation experience to enable you to navigate or switch between two or more pages in an app.
Launch Visual Studio 2022, and in the start window click Create a new
project to create a new project.
In the Create a new project window, select MAUI in the All project types
drop-down, select the .NET MAUI App template, and click the Next button:
In the configure your new project window, name your project, choose a
suitable location for it, and click the Next button:
In the Additional information window, click the Create button:
Once the project is created, we can able to see the Android, iOS, Windows
and other running options in the toolbar. Press the emulator or run button
to build and run the app
Implementation:
The navigation in .Net MAUI is similar with Xamarin.Forms Naviagtion
In Solution Explorer, click on MainPage.xaml. Add Title="Main Page" to ContentPage and replace the content of the page to what is shown below:
In the same way, create a new page as "Next Page" with button to navigate back to previous screen
The final output will be like below when we come all the above properties come together.
Full Code:
Download Code:
You can download the code from
GitHub. If you have
any doubts, feel free to post a comment. If you liked this article, and it is
useful to you, do like, share the article & star the repository on
GitHub.
October 01, 2022
In this tutorial series, we will see how to create a CardView in .Net MAUI using Border control. In .NET Maui provided Microsoft....
In this tutorial series, we will see how to create a CardView in .Net MAUI
using Border control. In .NET Maui provided Microsoft.Maui.Graphics library
which provide us a consistent UI drawing API based on native graphics engines,
thus making it easier for us to add borders, corners customisations, and
shadows for most of the controls and layout contained in .NET MAUI. The new
Border Control allows us to add Borders to a single element as a content (can
be both a control and a Layout). This brings us a very flexible behavior to
control of each corners: top-left, top-right, bottom-left, bottom-right, with
our user interface, some of those cases can be adding the border to a button
and rounding the upper left and lower right corners.
Launch Visual Studio 2022, and in the start window click Create a new
project to create a new project.
In the Create a new project window, select MAUI in the All project types
drop-down, select the .NET MAUI App template, and click the Next button:
In the configure your new project window, name your project, choose a
suitable location for it, and click the Next button:
In the Additional information window, click the Create button:
Once the project is created, we can able to see the Android, iOS, Windows
and other running options in the toolbar. Press the emulator or run button
to build and run the app
Implementation:
Open the MainPage.xaml file and add the following border control.
Border Properties
Stroke
Sets the color that the border will take on.
StrokeThickness
It’s the thickness (width) of the Border.
StrokeDashOffset
It’s the distance within the dash pattern.
StrokeDashArray
Collection of values, which is responsible for specifying the Dash
pattern and the spaces used for the border to implement.
StrokeLineCap
Defines the start and end stroke that the border will have. For the
stroke shape, it receives the following values: Flat, Round, and
Square.
StrokeMiterLimit
Limit on the ration of the miter length to half of the stroke
thickness.
We also having the StrokeShape property, which allows to modify the shape of the Stroke based on a Shape (the one you want), in addition to this Shape you can modify the edges as you need.
We also add shadow property to apply in CardView.
The final output will be like below when we come all the above properties come together.
Full Code:
Download Code:
You can download the code from
GitHub. If you have
any doubts, feel free to post a comment. If you liked this article, and it is
useful to you, do like, share the article & star the repository on
GitHub.
September 25, 2022
In this tutorial series, we will see how to manage the user subscription from the app as we are updating our Subscriptions policy ...
.Net MAUI - Manage Subscription in Android and iOS.
In this tutorial series, we will see how to manage the user subscription from
the app as we are updating our Subscriptions policy to state that users must
be able to easily cancel their subscriptions from within the app.
Project Setup:
To create .NET MAUI apps, we need the latest Visual Studio 2022 installed
with .NET Multi-platform App UI development workload with its default
optional installation options in our PC or mac machine.
Launch Visual Studio 2022, and in the start window click Create a new
project to create a new project.
In the Create a new project window, select MAUI in the All project types
drop-down, select the .NET MAUI App template, and click the Next button:
In the Configure your new project window, name your project, choose a
suitable location for it, and click the Next button:
In the Additional information window, click the Create button:
Once the project is created, we can able to see the Android, iOS, Windows
and other running options in the toolbar. Press the emulator or run button
to build and run the app
Implementation:
open the MainPage.xaml file and add the following button for subscription click
For Android, we can open the play store directly to specific app subscription if the sku and the app package name are known and the user is already subscribed. Also, we can open the subscription where all the non-exipry sucscribtions are listed.
This should also adhere to the app store guidelines.
Download Code:
You can download the code from
GitHub. If you
have any doubts, feel free to post a comment. If you liked this article, and
it is useful to you, do like, share the article & star the repository on
GitHub.
September 17, 2022
In this tutorial series, we will see the basic layout of sign-up screen using the MAUI controls in Visual Studio 2022 on Windows, ...
In this tutorial series, we will see the basic layout of sign-up screen using
the MAUI controls in Visual Studio 2022 on Windows, or Visual Studio 2022 for
Mac 17.4 Preview.
Project Setup:
To create .NET MAUI apps, we need the latest Visual Studio 2022 installed
with .NET Multi-platform App UI development workload with its default
optional installation options in our PC or mac machine.
Launch Visual Studio 2022, and in the start window click Create a new
project to create a new project.
In the Create a new project window, select MAUI in the All project types
drop-down, select the .NET MAUI App template, and click the Next button:
In the Configure your new project window, name your project, choose a
suitable location for it, and click the Next button:
In the Additional information window, click the Create button:
Once the project is created, we can able to see the Android, iOS, Windows
and other running options in the toolbar. Press the emulator or run button
to build and run the app
Implementation:
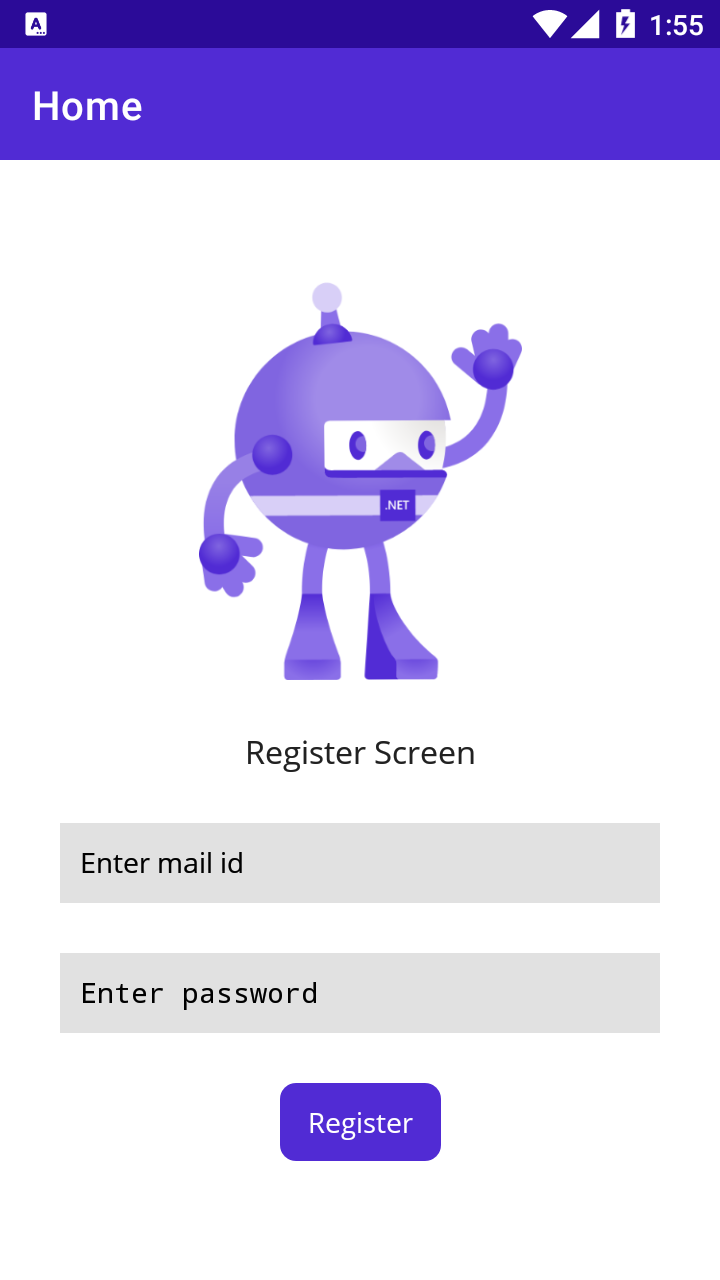
open the MainPage.xaml page designer file and add the following entries for
email and password like below
Result:
Android
Windows
Download:
You can download the code from
GitHub. If you have
any doubts, feel free to post a comment. If you liked this article, and it is
useful to you, do like, share the article & star the repository on
GitHub.
September 14, 2022
In this tutorial series, we'll learn how to create and run your first .NET Multi-platform App UI (.NET MAUI) app in Visual Studio ...
In this tutorial series, we'll learn how to create and run your first .NET
Multi-platform App UI (.NET MAUI) app in Visual Studio 2022 on Windows, or
Visual Studio 2022 for Mac 17.4 Preview.
Project Setup:
To create .NET MAUI apps, we need the latest Visual Studio 2022 installed
with .NET Multi-platform App UI development workload with its default
optional installation options in our PC or mac machine.
Launch Visual Studio 2022, and in the start window click Create a new
project to create a new project.
In the Create a new project window, select MAUI in the All project types
drop-down, select the .NET MAUI App template, and click the Next button:
In the Configure your new project window, name your project, choose a
suitable location for it, and click the Next button:
In the Additional information window, click the Create button:
Once the project is created, we can able to see the Android, iOS, Windows
and other running options in the toolbar. Press the emulator or run button
to build and run the app
Visual Studio will build the app, and deploy the app to the emulator or
device.
The sample app screen will be look like the below in Android, iOS and
Windows.


Follow Us
Were this world an endless plain, and by sailing eastward we could for ever reach new distances