Introduction: In this tutorial, we will learn how create Tabbed Page in Xamarin.Forms using Fresh MVVM. We already learned how to create ...

Tabbed Page in Xamarin.Forms using Fresh MVVM Tabbed Page in Xamarin.Forms using Fresh MVVM

A blog about android developement


Introduction:

In this tutorial, we will learn how create Tabbed Page in Xamarin.Forms using Fresh MVVM. We already learned how to create your master details page in my previous tutorials. If you are new to Fresh MVVM, You can read my previous article here.

Articles of FreshMVVM:

  1. MVVM Databinding in Xamarin.Forms using Fresh MVVM.
  2. Master Detail Page in Xamarin.Forms using Fresh MVVM.

Coding Part:

Steps:
I have split this part into 3 steps as in the following.
  1. Creating new Xamarin.Forms Projects.
  2. Setting up the plugin for Xamarin.Forms Application.
  3. Implementing Fresh MVVM Tabbed Page.

Step 1: Creating new Xamarin.Forms Projects

Create New Project by Selecting New -> Project -> Select Xamarin Cross Platform App and Click OK.
Then Select Android and iOS Platforms as shown below with Code Sharing Strategy as PCL or .Net Standard and Click OK.

Step 2: Setting up the plugin for Xamarin.Forms Application

We will start coding for Fresh MVVM. Create New Xamarin Forms Project. Open Nuget Package Manager against the solution and do search for Fresh MVVM Plugin or Paste the following Nuget Installation.
Install-Package FreshMvvm -Version 2.2.3
Click Install to install this Plugin against your PCL Project or .NET standard Project.

Step 3: Implementing Fresh MVVM Tabbed Page

  1. Create your XAML page (view) with name ended up with “Page”.
  2. Create PageModel by create Class name ended with “PageModel” and inherited with “FreshBasePageModel” as shown below screenshot.
  3. In the same way, I have created two pages “Detail1Page” and “Detail2Page” with two respective page models “Detail1PageModel” and “Detail2PageModel”.
Set MainPage:
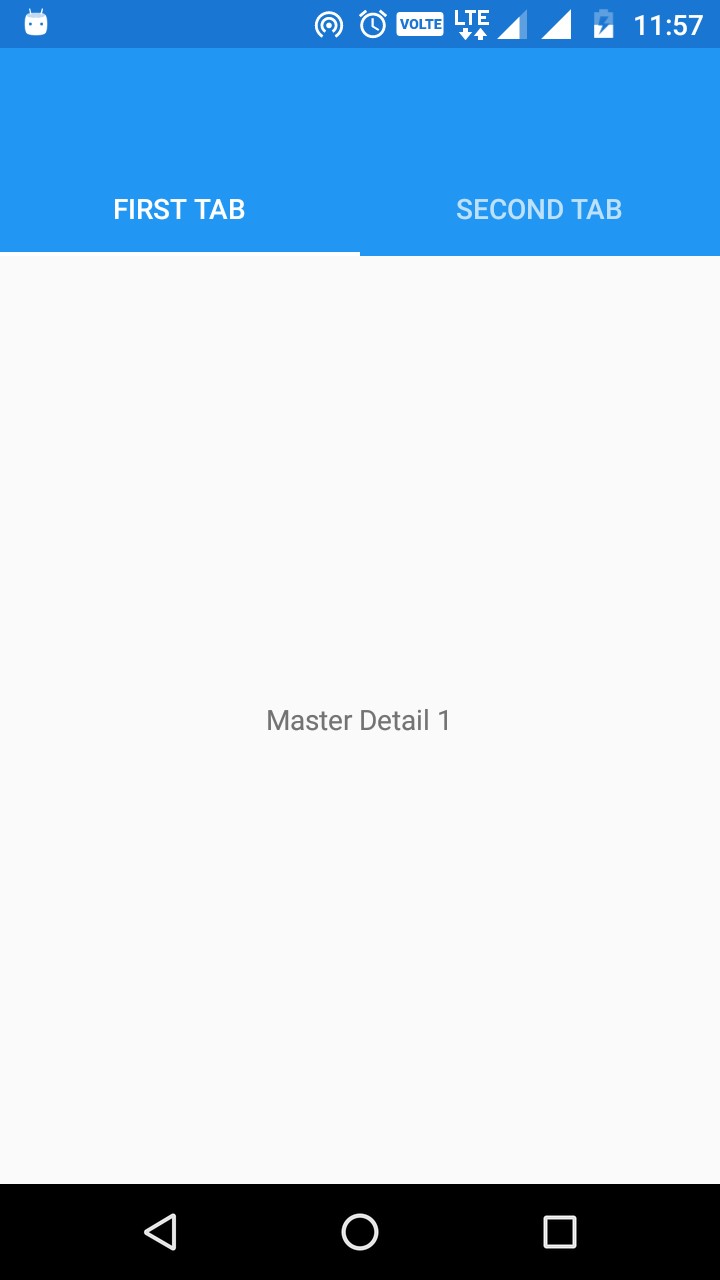
To create Fresh MVVM Tabbed Page as MainPage, we should use Fresh Tabbed Navigation Container with the following code. Open App.xaml.cs or App.cs and set MainPage.
var tabbedNavigation = new FreshTabbedNavigationContainer();
tabbedNavigation.AddTab("First Tab", null);
tabbedNavigation.AddTab("Second Tab", null);
MainPage = tabbedNavigation;
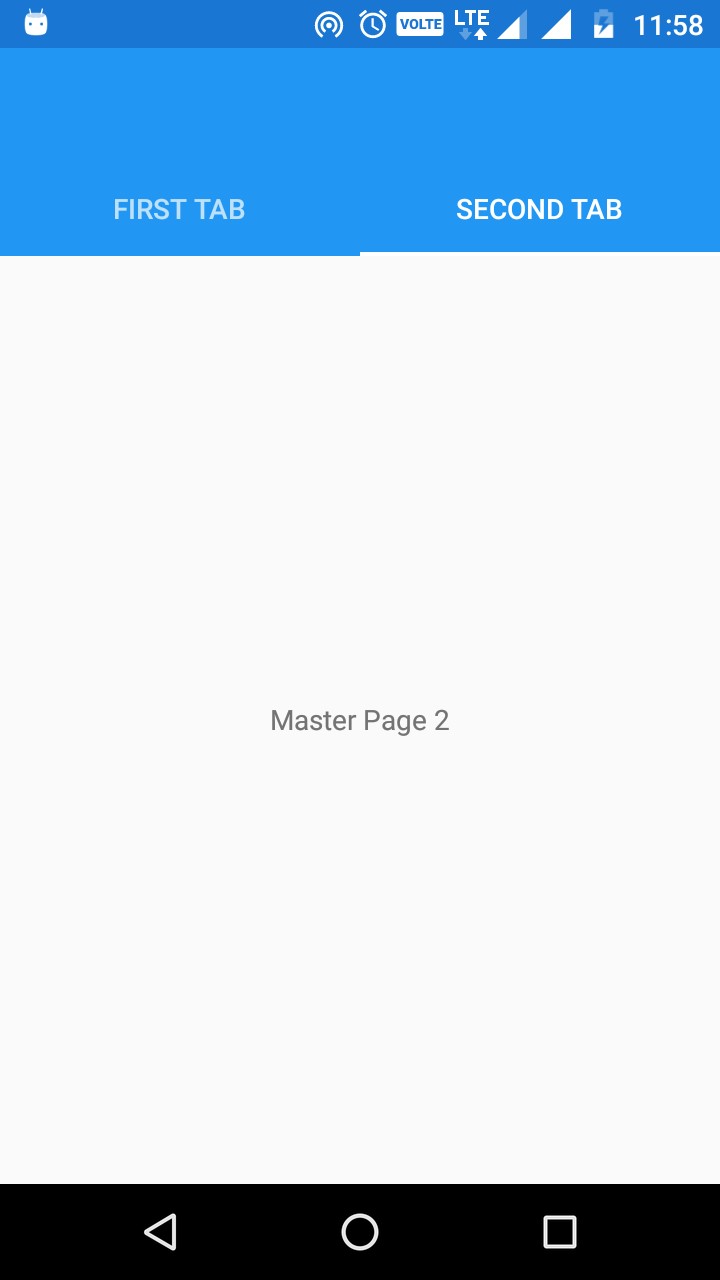
  • Then Click Run, your Tabbed Page will be look like as on the below screenshot.
  • Here, we will not discuss about navigation between pages. If you want to know, you can see my previous article on Fresh MVVM.
Full Code for App.xaml.cs:
You can find the code for App.xaml.cs below
public partial class App : Application
{
    public App()
    {
        try
        {
            InitializeComponent();
            var tabbedNavigation = new FreshTabbedNavigationContainer();
           tabbedNavigation.AddTab("First Tab", null);
           tabbedNavigation.AddTab("Second Tab", null);
           MainPage = tabbedNavigation;
        }
        catch (Exception ex)
        {

        }
    }

    protected override void OnStart()
    {
        // Handle when your app starts
    }

    protected override void OnSleep()
    {
        // Handle when your app sleeps
    }

    protected override void OnResume()
    {
        // Handle when your app resumes
    }
}

Download Code

You can download the code from GitHub. If you have doubt, feel free to post comment. If you like this article and is useful to you, do like, share the article & star the repository on GitHub.

Introduction: In this tutorial, we will learn how to perform MVVM approach in Xamarin.Forms using Fresh MVVM. MVVM approach is the b...

Master Detail Page in Xamarin.Forms using Fresh MVVM Master Detail Page in Xamarin.Forms using Fresh MVVM

A blog about android developement


Introduction:

In this tutorial, we will learn how to perform MVVM approach in Xamarin.Forms using Fresh MVVM. MVVM approach is the best approach for Xamarin.Forms and WPF Applications. There are a lot of MVVM plugins or libraries like FreshMVVM, MVVMCross, Prism, etc. available to simplify MVVM implementations.

FreshMVVM:

FreshMVVM is designed to perform MVVM easy and simple with Xamarin.Forms Application. It is created Michael Ridland. It has certain rules to perform MVVM Databinding. You can find the plugin from GitHub and Nuget.

Kindly refer my previous article on Fresh MVVM to know the basics & rules of Fresh MVVM.

Coding Part:

Steps:
I have split this part into 3 steps as in the following.
  1. Creating new Xamarin.Forms Projects.
  2. Setting up the plugin for Xamarin.Forms Application.
  3. Implementing Fresh MVVM.

Step 1: Creating new Xamarin.Forms Projects

Create New Project by Selecting New -> Project -> Select Xamarin Cross Platform App and Click OK.
Then Select Android and iOS Platforms as shown below with Code Sharing Strategy as PCL or .Net Standard and Click OK.

Step 2: Setting up the plugin for Xamarin.Forms Application

We will start coding for Fresh MVVM. Create New Xamarin Forms Project. Open Nuget Package Manager against the solution and do search for Fresh MVVM Plugin or Paste the following Nuget Installation.
Install-Package FreshMvvm -Version 2.2.3
Click Install to install this Plugin against your PCL Project or .NET standard Project.

Step 3: Implementing Fresh MVVM.

  1. Create your XAML page (view) with name ended up with “Page”.
  2. Create PageModel by create Class name ended with “PageModel” and inherited with “FreshBasePageModel” as shown below screenshot.
  3. In the same way, I have created two pages “Detail1Page” and “Detail2Page” with two respective page models “Detail1PageModel” and “Detail2PageModel”.
Set MainPage:
To create Fresh MVVM Master Detail Page as MainPage, we should use Fresh Master Detail Navigation Container with the following code. Open App.xaml.cs or App.cs and set MainPage.
var masterNavigation = new FreshMasterDetailNavigationContainer();
masterNavigation.Init("Menu");
masterNavigation.AddPage("First Page", null);
masterNavigation.AddPage("Second Page", null);
MainPage = masterNavigation;
  • Here, we will not discuss about navigation between pages. If you want to know, you can see my previous article on Fresh MVVM.
Full Code for App.xaml.cs:
You can find the code for App.xaml.cs below
public partial class App : Application
{
    public App()
    {
        try
        {
            InitializeComponent();
            var masterNavigation = new FreshMasterDetailNavigationContainer();
            masterNavigation.Init("Menu");
            masterNavigation.AddPage("First Page", null);
            masterNavigation.AddPage("Second Page", null);
            MainPage = masterNavigation;
        }
        catch (Exception ex)
        {

        }
    }

    protected override void OnStart()
    {
        // Handle when your app starts
    }

    protected override void OnSleep()
    {
        // Handle when your app sleeps
    }

    protected override void OnResume()
    {
        // Handle when your app resumes
    }
}

Download Code

You can download the code from GitHub. If you have doubt, feel free to post comment. If you like this article and is useful to you, do like, share the article & star the repository on GitHub.

Introduction: In this tutorial, we will learn how to perform MVVM approach in Xamarin.Forms using Fresh MVVM. MVVM approach is the best...

MVVM Databinding in Xamarin.Forms using Fresh MVVM MVVM Databinding in Xamarin.Forms using Fresh MVVM

A blog about android developement


Introduction:

In this tutorial, we will learn how to perform MVVM approach in Xamarin.Forms using Fresh MVVM. MVVM approach is the best approach for Xamarin.Forms and WPF Applications. There are a lot of MVVM plugins or libraries like FreshMVVM, MVVMCross, Prism, etc. available to simplify MVVM implementations.

FreshMVVM:

FreshMVVM is designed to perform MVVM easy and simple with Xamarin.Forms Application. It is created Michael Ridland. It has certain rules to perform MVVM Databinding. You can find the plugin from GitHub and Nuget.

Rules for FreshMVVM:
It has simple rules to do MVVM. It is the first and important rule. – The Views (Pages) name should be ended with Page. – The ViewModel name should be ended with PageModel. – The namespace of both Page and Pagemodel should be name. – You don’t need to set BindingContext manually. The plugin will detect the View and ViewModel with its name. We will start coding with Fresh MVVM.

Coding Part:

Steps:
I have split this part into 3 steps as in the following.
  1. Creating new Xamarin.Forms Projects.
  2. Setting up the plugin for Xamarin.Forms Application.
  3. Implementing Fresh MVVM.

Step 1: Creating new Xamarin.Forms Projects

Create New Project by Selecting New -> Project -> Select Xamarin Cross Platform App and Click OK.
Then Select Android and iOS Platforms as shown below with Code Sharing Strategy as PCL or .Net Standard and Click OK.

Step 2: Setting up the plugin for Xamarin.Forms Application

We will start coding for Fresh MVVM. Create New Xamarin Forms Project. Open Nuget Package Manager against the solution and do search for Fresh MVVM Plugin or Paste the following Nuget Installation.
Install-Package FreshMvvm -Version 2.2.3
Click Install to install this Plugin against your PCL Project or .NET standard Project.

Step 3: Implementing Fresh MVVM.

  1. Create your XAML page (view) with name ended up with “Page”.
  2. Create PageModel by create Class name ended with “PageModel” and inherited with “FreshBasePageModel” as shown below screenshot.
  3. The namespace of Page and PageModel should be same as shown in the above screenshots. – The Binding Properties and Command Properties are implemented same as like normal MVVM approach. – To indicate the binding properties changed by using RaisePropertyChanged instead of OnPropertyChanged event in Normal MVVM. – The following code is used to raise the property changed.
    RaisePropertyChanged("MainPageLabel");
  4. Set MainPage:
    To initialize the FreshMVVM Navigation you should set the MainPage with FreshMVVM Navigation Container with the following code. Open App.xaml.cs or App.cs and set MainPage. 
    var page = FreshPageModelResolver.ResolvePageModel<MainPageModel>();
    var basicNavContainer = new FreshNavigationContainer(page);
    MainPage = basicNavContainer;
    Navigation between Pages:
    FreshMVVM itself has Navigation methods to make navigation between the pages.
    1. Use PushPageModel for pushing the page in the navigation stack or goto next page instead of PushAsync in normal MVVM.
      await CoreMethods.PushPageModel();
      It is equivalent to the following
      Navigation.PushAsync(new SecondPage());
    2. Use PopPageModel for popping the page from navigation stack instead of PopAsync in normal MVVM.
      await CoreMethods.PopPageModel();
      It is equivalent to the following
      Navigation.PopAsync();
    3. Use PopToRoot to navigate from any page to root page instead of PopToAsync in normal MVVM.
      await CoreMethods.PopToRoot(animate:false);
      It is equivalent to the following
      Navigation.PopToRootAsync();

Full Code for MainPageModel:

You can find the code for MainPageModel below
namespace FreshMVVMSample
{
    public class MainPageModel : FreshBasePageModel
    {

        #region Default Override functions
        public override void Init(object initData)
        {
            base.Init(initData);
            MainPageLabel = "Welcome to Fresh Mvvm Tutorial!";
        }

        public override void ReverseInit(object returnedData)
        {
            base.ReverseInit(returnedData);
        }

        protected override void ViewIsAppearing(object sender, EventArgs e)
        {
            base.ViewIsAppearing(sender, e);
        }

        protected override void ViewIsDisappearing(object sender, EventArgs e)
        {
            base.ViewIsDisappearing(sender, e);
        }
        #endregion

        #region Commands
        public Command GotoSecondPageCommand
        {
            get
            {
                return new Command(async () =>
                {
                    await CoreMethods.PushPageModel<SecondPageModel>();
                });
            }
        }
        #endregion

        #region Properties
        string _mainPageLabel = string.Empty;
        public string MainPageLabel
        {
            get
            {
                return _mainPageLabel;
            }
            set
            {
                if (_mainPageLabel != value)
                {
                    _mainPageLabel = value;
                    RaisePropertyChanged(nameof(MainPageLabel));
                }
            }
        }
        #endregion

    }
}

Download Code

You can download the code from GitHub. If you have doubt, feel free to post comment. If you like this article and is useful to you, do like, share the article & star the repository on GitHub.

Introduction  Here, I have created a Weather App to demonstrate Retrofit 2 with Kotlin. The same example was created for my previous a...

How To Use Retrofit 2 With Android Using Kotlin How To Use Retrofit 2 With Android Using Kotlin

A blog about android developement

Introduction 

Here, I have created a Weather App to demonstrate Retrofit 2 with Kotlin. The same example was created for my previous article “How to Create Weather App Using Retrofit 2 in Android”. You can read my previous article here.

Coding Part 

I have detailed the article in the following sections. 
  1. Creating a new project with Empty activity. 
  2. Setting up the Retrofit HTTP Library and Manifest. 
  3. Implementation of Retrofit with Kotlin.

Step 1 - Creating a new project with Kotlin

  1. Open Android Studio and select "Create new project". 
  2. Name the project as per your wish and tick the "Kotlin checkbox support". 
  3. Then, select your Activity type (For Example - Navigation Drawer Activity, Empty Activity, etc.).
  4. Click the “Finish” button to create a new project in Android Studio.

Step 2 - Setting up the Retrofit HTTP Library and Manifest

The following lines are added to your Kotlin project by default.
dependencies {   
    …  
    implementation 'org.jetbrains.kotlin:kotlin-stdlib-jre7:$kotlin_version'  
    implementation 'com.squareup.retrofit2:retrofit:2.0.0'  
    implementation 'com.squareup.retrofit2:converter-gson:2.0.0'
    …  
}
And also, we need to add the INTERNET permissions in AndroidManifest.xml
<uses-permission android:name="android.permission.INTERNET"/>

Step 3 - Implementation of Retrofit with Kotlin

The following API link is used to get the current weather report with respect to the geo-coordinates. The sample API link is here. To know, “How to setting up the Open Weather API”, visit my previous article link. Let's see how to use the link to access the weather data.
  1. Create an interface file named as “WeatherService.kt” and add the following lines in it.
    interface WeatherService {  
        @GET("data/2.5/weather?")  
        fun getCurrentWeatherData(@Query("lat") lat: String, @Query("lon") lon: String, @Query("APPID") app_id: String): Call  
    }
  2. Create a class file named as “WeatherResponse.kt” and add the following lines. Here, we used a Gson Converter and so the JSON response is automatically converted to the respective and the converter will compare the response tree with the serialized name.
    class WeatherResponse {  
      
        @SerializedName("coord")  
        var coord: Coord? = null  
        @SerializedName("sys")  
        var sys: Sys? = null  
        @SerializedName("weather")  
        var weather = ArrayList()  
        @SerializedName("main")  
        var main: Main? = null  
        @SerializedName("wind")  
        var wind: Wind? = null  
        @SerializedName("rain")  
        var rain: Rain? = null  
        @SerializedName("clouds")  
        var clouds: Clouds? = null  
        @SerializedName("dt")  
        var dt: Float = 0.toFloat()  
        @SerializedName("id")  
        var id: Int = 0  
        @SerializedName("name")  
        var name: String? = null  
        @SerializedName("cod")  
        var cod: Float = 0.toFloat()  
    }  
      
    class Weather {  
        @SerializedName("id")  
        var id: Int = 0  
        @SerializedName("main")  
        var main: String? = null  
        @SerializedName("description")  
        var description: String? = null  
        @SerializedName("icon")  
        var icon: String? = null  
    }  
      
    class Clouds {  
        @SerializedName("all")  
        var all: Float = 0.toFloat()  
    }  
      
    class Rain {  
        @SerializedName("3h")  
        var h3: Float = 0.toFloat()  
    }  
      
    class Wind {  
        @SerializedName("speed")  
        var speed: Float = 0.toFloat()  
        @SerializedName("deg")  
        var deg: Float = 0.toFloat()  
    }  
      
    class Main {  
        @SerializedName("temp")  
        var temp: Float = 0.toFloat()  
        @SerializedName("humidity")  
        var humidity: Float = 0.toFloat()  
        @SerializedName("pressure")  
        var pressure: Float = 0.toFloat()  
        @SerializedName("temp_min")  
        var temp_min: Float = 0.toFloat()  
        @SerializedName("temp_max")  
        var temp_max: Float = 0.toFloat()  
    }  
      
    class Sys {  
        @SerializedName("country")  
        var country: String? = null  
        @SerializedName("sunrise")  
        var sunrise: Long = 0  
        @SerializedName("sunset")  
        var sunset: Long = 0  
    }  
      
    class Coord {  
        @SerializedName("lon")  
        var lon: Float = 0.toFloat()  
        @SerializedName("lat")  
        var lat: Float = 0.toFloat()  
    }
  3. Then, open your Activity file and in my case, I have opened my MainActivity.kt file. Then, create Retrofit Builder with Base URL and GsonConverterFactory.
    val retrofit = Retrofit.Builder()  
    .baseUrl(BaseUrl)  
    .addConverterFactory(GsonConverterFactory.create())  
    .build()
  4. Then, create a service for Retrofit with your service interface, as shown below.
    val retrofit = Retrofit.Builder()  
    .baseUrl(BaseUrl)  
    .addConverterFactory(GsonConverterFactory.create())  
    .build()
    Here, “getCurrentWeatherData” is an interface function created in the “WeatherService” interface.
  5. Then, create a queue with Weather Response which is used to de-serialize the JSON output of the Open Weather API. The following will show the created queue.
    call.enqueue(object : Callback {  
                override fun onResponse(call: Call, response: Response) {  
                    if (response.code() == 200) {  
                        …  
                    }  
                }  
                override fun onFailure(call: Call, t: Throwable) {  
                    …  
            }  
       })

Full Code

You can find the full code implementation of the app here.
class MainActivity : AppCompatActivity() {    
    private var weatherData: TextView? = null    
    override fun onCreate(savedInstanceState: Bundle?) {    
        super.onCreate(savedInstanceState)    
        setContentView(R.layout.activity_main)    
        weatherData = findViewById(R.id.textView)    
        findViewById(R.id.button).setOnClickListener { getCurrentData() }    
    }    
    internal fun getCurrentData() {    
        val retrofit = Retrofit.Builder()    
                .baseUrl(BaseUrl)    
                .addConverterFactory(GsonConverterFactory.create())    
                .build()    
        val service = retrofit.create(WeatherService::class.java)    
        val call = service.getCurrentWeatherData(lat, lon, AppId)    
        call.enqueue(object : Callback {    
            override fun onResponse(call: Call, response: Response) {    
                if (response.code() == 200) {    
                    val weatherResponse = response.body()!!    
    
                    val stringBuilder = "Country: " +    
                            weatherResponse.sys!!.country +    
                            "\n" +    
                            "Temperature: " +    
                            weatherResponse.main!!.temp +    
                            "\n" +    
                            "Temperature(Min): " +    
                            weatherResponse.main!!.temp_min +    
                            "\n" +    
                            "Temperature(Max): " +    
                            weatherResponse.main!!.temp_max +    
                            "\n" +    
                            "Humidity: " +    
                            weatherResponse.main!!.humidity +    
                            "\n" +    
                            "Pressure: " +    
                            weatherResponse.main!!.pressure    
    
                    weatherData!!.text = stringBuilder    
                }    
            }    
    
            override fun onFailure(call: Call, t: Throwable) {    
                weatherData!!.text = t.message    
            }    
        })    
    }    
    companion object {    
    
        var BaseUrl = "http://api.openweathermap.org/"    
        var AppId = "2e65127e909e178d0af311a81f39948c"    
        var lat = "35"    
        var lon = "139"    
    }    
}

Reference

  1. https://square.github.io/retrofit/ 
  2. https://openweathermap.org/api 
  3. https://developer.android.com/kotlin/ 
If you have any doubt or need any help, contact me.

Download Code:

You can download the full source code of the article in GitHub. If you like this article, do star the repo in GitHub. Hit like the article.

Introduction: In my previous article , we have learned How to handle “android.os.FileUriExposedException”, if we have an app that share...

How to use Camera API for Android N and above devices in Android How to use Camera API for Android N and above devices in Android

A blog about android developement


Introduction:

In my previous article, we have learned How to handle “android.os.FileUriExposedException”, if we have an app that shares files with other apps using an Uri on API 24+. In this article, we will learn “How to use Camera Intent in Android N above devices”.

Creating New Project with Android Studio:

  1. Open Android Studio and Select Create new project. 
  2. Name the project as your wish and select your activity template.


  3. Click “finish” button to create new project in Android Studio.

Steps to use Camera API:

  1. We already know how to open camera from our app using intents. But for Android N & above devices, Google changed the approach for accessing Camera API.
  2. In this step, we will see how to use Camera Intent for Pre Android N & Android N above devices.
  3. Open your MainActivity.java file and add a button with click event to open Camera. The following code snippet shows the camera intent.
    btnPickCamera.setOnClickListener(new View.OnClickListener() {
     @Override
     public void onClick(View view) {
      // Checking Permission for Android M and above
      if (ActivityCompat.checkSelfPermission(MainActivity.this,
        Manifest.permission.CAMERA) != PackageManager.PERMISSION_GRANTED
        || ActivityCompat.checkSelfPermission(MainActivity.this,
        Manifest.permission.READ_EXTERNAL_STORAGE) != PackageManager.PERMISSION_GRANTED) {
       ActivityCompat.requestPermissions(MainActivity.this,
         new String[]{Manifest.permission.CAMERA, Manifest.permission.READ_EXTERNAL_STORAGE}, PICK_FROM_CAMERA);
       return;
      }
    
      if (Build.VERSION.SDK_INT >= Build.VERSION_CODES.N) {
       ContentValues values = new ContentValues(1);
       values.put(MediaStore.Images.Media.MIME_TYPE, "image/jpg");
       outputFileUri = getContentResolver().insert(MediaStore.Images.Media.EXTERNAL_CONTENT_URI, values);
       Intent captureIntent = new Intent(MediaStore.ACTION_IMAGE_CAPTURE);
       captureIntent.addFlags(Intent.FLAG_GRANT_READ_URI_PERMISSION | Intent.FLAG_GRANT_WRITE_URI_PERMISSION);
       captureIntent.putExtra(MediaStore.EXTRA_OUTPUT, outputFileUri);
       startActivityForResult(captureIntent, PICK_FROM_CAMERA);
      } else {
       Intent captureIntent = new Intent(MediaStore.ACTION_IMAGE_CAPTURE);
       File file = new File(Environment.getExternalStorageDirectory(), "MyPhoto.jpg");
       outputFileUri = Uri.fromFile(file);
       captureIntent.putExtra(MediaStore.EXTRA_OUTPUT, outputFileUri);
       startActivityForResult(captureIntent, PICK_FROM_CAMERA);
      }
     }
    });
  4. Here, I have added runtime permission checking for Android M & above devices.
    ContentValues values = new ContentValues(1);
    values.put(MediaStore.Images.Media.MIME_TYPE, "image/jpg");
    outputFileUri = getContentResolver().insert(MediaStore.Images.Media.EXTERNAL_CONTENT_URI, values);
    Intent captureIntent = new Intent(MediaStore.ACTION_IMAGE_CAPTURE);
    captureIntent.addFlags(Intent.FLAG_GRANT_READ_URI_PERMISSION |       Intent.FLAG_GRANT_WRITE_URI_PERMISSION);
    captureIntent.putExtra(MediaStore.EXTRA_OUTPUT, outputFileUri);
    startActivityForResult(captureIntent, PICK_FROM_CAMERA);
  5. Here, we have created ContentValues and added MIME type as image. Then created an output Uri for the camera api output image.
  6. Then we have added flags “FLAG_GRANT_READ_URI_PERMISSION” and “FLAG_GRANT_WRITE_URI_PERMISSION” to allow the camera api to take image in Android N & above devices.
  7. We can retrieve the picked camera image by “onActivityResult” and same like the old approach

Full Code:

The following code shows, How to access image from Gallery, How to take picture from camera & How to open file using intent in Android N & above devices.

public class MainActivity extends AppCompatActivity {

    ImageView imgPreview;
    TextView imgPath;
    Button btnPickCamera;
    Button btnPickGallery;
    Button btnOpenFile;

    Uri outputFileUri;
    private static final int PICK_FROM_CAMERA = 1;
    private static final int PICK_FROM_GALLERY = 2;

    @Override
    protected void onCreate(Bundle savedInstanceState) {
        super.onCreate(savedInstanceState);
        setContentView(R.layout.activity_main);
        initViews();
        initOperations();
    }

    private void initViews() {
        imgPreview = findViewById(R.id.imgPreview);
        imgPath = findViewById(R.id.imgPath);
        btnPickCamera = findViewById(R.id.btnCapture);
        btnPickGallery = findViewById(R.id.btnGallery);
        btnOpenFile = findViewById(R.id.btnOpenImg);
    }

    private void initOperations() {
        btnPickGallery.setOnClickListener(new View.OnClickListener() {
            @TargetApi(Build.VERSION_CODES.JELLY_BEAN)
            @Override
            public void onClick(View view) {
                // Checking Permission for Android M and above
                if (ActivityCompat.checkSelfPermission(MainActivity.this,
                        Manifest.permission.READ_EXTERNAL_STORAGE) != PackageManager.PERMISSION_GRANTED) {
                    ActivityCompat.requestPermissions(MainActivity.this,
                            new String[]{Manifest.permission.READ_EXTERNAL_STORAGE}, PICK_FROM_GALLERY);
                    return;
                }
                Intent galleryIntent = new Intent(Intent.ACTION_PICK, MediaStore.Images.Media.EXTERNAL_CONTENT_URI);
                // Start the Intent
                startActivityForResult(galleryIntent, PICK_FROM_GALLERY);
            }
        });

        btnPickCamera.setOnClickListener(new View.OnClickListener() {
            @Override
            public void onClick(View view) {
                // Checking Permission for Android M and above
                if (ActivityCompat.checkSelfPermission(MainActivity.this,
                        Manifest.permission.CAMERA) != PackageManager.PERMISSION_GRANTED
                        || ActivityCompat.checkSelfPermission(MainActivity.this,
                        Manifest.permission.READ_EXTERNAL_STORAGE) != PackageManager.PERMISSION_GRANTED) {
                    ActivityCompat.requestPermissions(MainActivity.this,
                            new String[]{Manifest.permission.CAMERA, Manifest.permission.READ_EXTERNAL_STORAGE}, PICK_FROM_CAMERA);
                    return;
                }

                if (Build.VERSION.SDK_INT >= Build.VERSION_CODES.N) {
                    ContentValues values = new ContentValues(1);
                    values.put(MediaStore.Images.Media.MIME_TYPE, "image/jpg");
                    outputFileUri = getContentResolver().insert(MediaStore.Images.Media.EXTERNAL_CONTENT_URI, values);
                    Intent captureIntent = new Intent(MediaStore.ACTION_IMAGE_CAPTURE);
                    captureIntent.addFlags(Intent.FLAG_GRANT_READ_URI_PERMISSION | Intent.FLAG_GRANT_WRITE_URI_PERMISSION);
                    captureIntent.putExtra(MediaStore.EXTRA_OUTPUT, outputFileUri);
                    startActivityForResult(captureIntent, PICK_FROM_CAMERA);
                } else {
                    Intent captureIntent = new Intent(MediaStore.ACTION_IMAGE_CAPTURE);
                    File file = new File(Environment.getExternalStorageDirectory(), "MyPhoto.jpg");
                    outputFileUri = Uri.fromFile(file);
                    captureIntent.putExtra(MediaStore.EXTRA_OUTPUT, outputFileUri);
                    startActivityForResult(captureIntent, PICK_FROM_CAMERA);
                }
            }
        });

        btnOpenFile.setOnClickListener(new View.OnClickListener() {
            @RequiresApi(api = Build.VERSION_CODES.JELLY_BEAN)
            @Override
            public void onClick(View v) {
                // Checking Permission for Android M and above
                if (ActivityCompat.checkSelfPermission(MainActivity.this,
                        Manifest.permission.READ_EXTERNAL_STORAGE) != PackageManager.PERMISSION_GRANTED) {
                    ActivityCompat.requestPermissions(MainActivity.this,
                            new String[]{Manifest.permission.READ_EXTERNAL_STORAGE}, PICK_FROM_GALLERY);
                    return;
                }
                File file = new File(imgPath.getText().toString());
                Intent intent = new Intent(Intent.ACTION_VIEW);
                intent.setFlags(Intent.FLAG_ACTIVITY_CLEAR_TOP | Intent.FLAG_ACTIVITY_NEW_TASK);
                if (Build.VERSION.SDK_INT >= Build.VERSION_CODES.N) {
                    Uri apkURI = FileProvider.getUriForFile(getApplicationContext(), getPackageName() + ".provider", file);
                    intent.setDataAndType(apkURI, "image/jpg");
                    intent.addFlags(Intent.FLAG_GRANT_READ_URI_PERMISSION);
                } else {
                    intent.setDataAndType(Uri.fromFile(file), "image/jpg");
                }
                startActivity(intent);
            }
        });
    }

    @Override
    protected void onActivityResult(int requestCode, int resultCode, Intent data) {
        super.onActivityResult(requestCode, resultCode, data);
        Bitmap bitmap;
        switch (requestCode) {
            case PICK_FROM_CAMERA:
                if (resultCode == Activity.RESULT_OK) {

                    Uri selectedImage = outputFileUri;
                    ContentResolver cr = getContentResolver();
                    getContentResolver().notifyChange(selectedImage, null);
                    try {
                        bitmap = android.provider.MediaStore.Images.Media.getBitmap(cr, selectedImage);
                        int nh = (int) ( bitmap.getHeight() * (512.0 / bitmap.getWidth()) );
                        bitmap = Bitmap.createScaledBitmap(bitmap, 512, nh, true);
                        imgPreview.setImageBitmap(bitmap);
                        imgPath.setText(outputFileUri.getPath());
                    } catch (Exception e) {
                        Toast.makeText(this, "Failed to load", Toast.LENGTH_SHORT)
                                .show();
                    }
                }
                break;
            case PICK_FROM_GALLERY:
                if (resultCode == Activity.RESULT_OK) {
                    //pick image from gallery
                    Uri selectedImage = data.getData();
                    String[] filePathColumn = {MediaStore.Images.Media.DATA};
                    // Get the cursor
                    assert selectedImage != null;
                    Cursor cursor = getContentResolver().query(selectedImage, filePathColumn,
                            null, null, null);
                    // Move to first row
                    assert cursor != null;
                    cursor.moveToFirst();

                    int columnIndex = cursor.getColumnIndex(filePathColumn[0]);
                    String imgDecodableString = cursor.getString(columnIndex);
                    cursor.close();
                    bitmap = BitmapFactory.decodeFile(imgDecodableString);
                    imgPreview.setImageBitmap(bitmap);
                    imgPath.setText(imgDecodableString);
                }
                break;
        }
    }
}

Download Code 

You can download the full source code from GitHub. If you like this article, do like, share and star the repo in GitHub.

Introduction: In this article, we will learn How to handle “android.os.FileUriExposedException”, if we have an app that shares files w...

How to handle “android.os.FileUriExposedException” in Android How to handle “android.os.FileUriExposedException” in Android

A blog about android developement

Introduction:

In this article, we will learn How to handle “android.os.FileUriExposedException”, if we have an app that shares files with other apps using an Uri on API 24+. As of Android N, we need to use FileProvider API 

Creating New Project with Android Studio

  1. Open Android Studio and Select Create new project. 
  2. Name the project as your wish and select your activity template.


  3. Click “finish” button to create new project in Android Studio.

Steps to Change File Provider API 

To replace “file://” to “uri://”, We should follow the three steps.

Step 1: Change Manifest Entry
  1. Add <provider /> tag with FileProvider inside the tag as shown in the below code.
    <provider
     android:name="android.support.v4.content.FileProvider"
     android:authorities="${applicationId}.provider"
     android:exported="false"
     android:grantUriPermissions="true">
     <meta-data
      android:name="android.support.FILE_PROVIDER_PATHS"
      android:resource="@xml/provider_paths"/>
    </provider>
  2. Here, provider_paths is a xml file which is used to specify the path to be accessed via File Provider API for Android N & above devices.
  3. Don't forget to add the following permission in your manifest file
    <uses-permission android:name="android.permission.READ_EXTERNAL_STORAGE" />
Step 2: Create XML file in res/xml/provider_paths.xml
  1. Create a new xml folder in res folder. Then create xml file and named as provider_paths.xml
  2. Add the following code to the file.
    <?xml version="1.0" encoding="utf-8"?>
    <paths>
        <external-path name="external_files" path="."/>
    </paths>
Step 3: Create an Intent to open file for Android N
  1. Change the normal Uri method for Android N.
    File file = new File("File Path");
    Uri.fromFile(file)
    To
    File file = new File("File Path");
    Uri apkURI = FileProvider.getUriForFile(getApplicationContext(), getPackageName() + ".provider", file);
  2. Then Grant Read Uri Permission for Android N & above devices. The following code shows how to use Open file Intent for Android N devices & before Android N devices.
    File file = new File("File Path");
    Intent intent = new Intent(Intent.ACTION_VIEW);
    intent.setFlags(Intent.FLAG_ACTIVITY_CLEAR_TOP | Intent.FLAG_ACTIVITY_NEW_TASK);
    if (Build.VERSION.SDK_INT >= Build.VERSION_CODES.N) {
     Uri apkURI = FileProvider.getUriForFile(getApplicationContext(), getPackageName() + ".provider", file);
     intent.setDataAndType(apkURI, "image/jpg");
     intent.addFlags(Intent.FLAG_GRANT_READ_URI_PERMISSION);
    } else {
     intent.setDataAndType(Uri.fromFile(file), "image/jpg");
    }
    startActivity(intent);

Reference:

https://developer.android.com/reference/android/support/v4/content/FileProvider.html
If you have any doubt or need any help, contact me.

Next Article:

It is a first part for accessing file uri for Android N & above devices. Next article, we will learn how to access Camera API for Android N & above devices.

In this article, we will learn how to download any files from online server and save the same to the local directory of the Android an...

How to download files in Xamarin.Forms How to download files in Xamarin.Forms

A blog about android developement

xfdownload

In this article, we will learn how to download any files from online server and save the same to the local directory of the Android and iOS Phones.

Platform Support:

Here, we have used DependencyService to download any file from server path. Because, we cannot download any file directly in Xamarin.Forms. We will see the DependencyService for Android and iOS Platforms. It is similar to UWP with slight changes.

DependencyService:

Xamarin.Forms allows developers to define behaviour in platform-specific projects. DependencyService then finds the right platform implementation, allowing shared code to access the native functionality. To know more about DependencyService Click Here.  Without much introduction, we will skip into the coding part of this article.

Coding Part:

Steps: 

I have explained the method to create DependencyService with the steps as shown in the following. 
Step 1: Creating new Xamarin.Forms Projects.
Step 2: Setting up AndroidManifest and info.plist
Step 3: Creating a Dependency Service for Android and iOS Platforms.
Step 4: Implementing the functionality to download the file in PCL.

Step 1 Creating new Xamarin.Forms Projects.

Create New Project by Selecting New -> Project -> Select Xamarin Cross Platform App and Click OK.
pro1

Then Select Android and iOS Platforms as shown below with Code Sharing Strategy as PCL or .Net Standard and Click OK.
pro2

Step 2 Setting up AndroidManifest and info.plist

Before starting, we need to make some setup respective to the Platforms.
For Android:
  1. Expand your Android Project and open Properties.
  2. Then add or check the permissions.(INTERNET,WRITE EXTERNAL STORAGE)
  3. Then click Save.
For iOS:
  1. Expand your iOS Project and Open your Info.plist file with XML Editor.
  2. Then add the following Permissions.
    <key>NSPhotoLibraryAddUsageDescription </key>
    <string>Need permission to save files.</string>
  3. It provides permission to save file.
    <key>NSPhotoLibraryUsageDescription</key>
    <string>Need permission to access files.</string>
  4. It provides permission to access files.
From iOS 11, Separate Permission Patterns are followed for saving and Accessing the Storage or Gallery.

Step 3 Creating Dependency Service by Platform wise.

In Xamarin.Forms, we need to go with dependency service to download files.
  1. First we need to create an interface in your PCL or Shared Projects. In my case, I have created an Interface named as “IDownloader.cs”.
  2. Then Paste the following code in that.
    public interface IDownloader
    {
     void DownloadFile(string url, string folder);
     event EventHandler OnFileDownloaded;
    }
  3. Here, I have create a custom event handler to notify app users about file download. You have create a class named as “DownloadEventArgs” and Paste the following code.
    public class DownloadEventArgs : EventArgs
    {
     public bool FileSaved = false;
     public DownloadEventArgs(bool fileSaved)
     {
      FileSaved = fileSaved;
     }
    }

For Android:

  1. Create a class named as “AndroidDownloader.cs” in your Android Project and implements the class with “IDownloader” interface created in your Portable Library. 
  2. We can use WebClient to download any file from the given URL. WebClient is used for both Android and iOS Platforms to download files.
  3. You can find the code used in Android Platform.
    public class AndroidDownloader : IDownloader
    {
     public event EventHandler OnFileDownloaded;
    
     public void DownloadFile(string url, string folder)
     {
      string pathToNewFolder = Path.Combine(Android.OS.Environment.ExternalStorageDirectory.AbsolutePath, folder);
      Directory.CreateDirectory(pathToNewFolder);
    
      try
      {
       WebClient webClient = new WebClient();
       webClient.DownloadFileCompleted += new AsyncCompletedEventHandler(Completed);
       string pathToNewFile = Path.Combine(pathToNewFolder, Path.GetFileName(url));
       webClient.DownloadFileAsync(new Uri(url), pathToNewFile);
      }
      catch (Exception ex)
      {
       if (OnFileDownloaded != null)
        OnFileDownloaded.Invoke(this, new DownloadEventArgs(false));
      }
     }
    
     private void Completed(object sender, AsyncCompletedEventArgs e)
     {
      if (e.Error != null)
      {
       if (OnFileDownloaded != null)
        OnFileDownloaded.Invoke(this, new DownloadEventArgs(false));
      }
      else
      {
       if (OnFileDownloaded != null)
        OnFileDownloaded.Invoke(this, new DownloadEventArgs(true));
      }
     }
    }
  4. Here, WebClient has an async event for notifying the download event completion.
  5. The Download event is notified by invoking the custom event created with Dependency Service from Android Platform code.

For iOS:

  1. Create a class named as “iOSDownloader.cs” in your iOS Project and implements the class with “IDownloader” interface created in your Portable Library. 
  2. We can use WebClient to download any file from the given URL. WebClient is used for both Android and iOS Platforms to download files.
  3. You can find the code used in iOS Platform.
    public class IosDownloader : IDownloader
    {
     public event EventHandler OnFileDownloaded;
    
     public void DownloadFile(string url, string folder)
     {
      string pathToNewFolder = Path.Combine(Environment.GetFolderPath(Environment.SpecialFolder.Personal), folder);
      Directory.CreateDirectory(pathToNewFolder);
    
      try
      {
       WebClient webClient = new WebClient();
       webClient.DownloadFileCompleted += new AsyncCompletedEventHandler(Completed);
       string pathToNewFile = Path.Combine(pathToNewFolder, Path.GetFileName(url));
       webClient.DownloadFileAsync(new Uri(url), pathToNewFile);
      }
      catch (Exception ex)
      {
       if (OnFileDownloaded != null)
        OnFileDownloaded.Invoke(this, new DownloadEventArgs(false));
      }
     }
    
     private void Completed(object sender, AsyncCompletedEventArgs e)
     {
      if (e.Error != null)
      {
       if (OnFileDownloaded != null)
        OnFileDownloaded.Invoke(this, new DownloadEventArgs(false));
      }
      else
      {
       if (OnFileDownloaded != null)
        OnFileDownloaded.Invoke(this, new DownloadEventArgs(true));
      }
     }
    }
  4. Here, WebClient has an async event for notifying the download event completion.
  5. The Download event is notified by invoking the custom event created with Dependency Service from iOS Platform code.
Don’t forget to add the following lines above the namespace of your Dependency Service classes.
[assembly: Dependency(typeof(Dependency_Class_Name))]

Step 4: Implementing the functionality to download the file in PCL

The following code shows the following points – How to subscribe the download event. – How to call the download function.
public partial class MainPage : ContentPage
{
 IDownloader downloader = DependencyService.Get();
 public MainPage()
 {
  InitializeComponent();
  downloader.OnFileDownloaded += OnFileDownloaded;
 }

 private void OnFileDownloaded(object sender, DownloadEventArgs e)
 {
  if (e.FileSaved)
  {
   DisplayAlert("XF Downloader", "File Saved Successfully", "Close");
  }
  else
  {
   DisplayAlert("XF Downloader", "Error while saving the file", "Close");
  }
 }

 private void DownloadClicked(object sender, EventArgs e)
 {
  downloader.DownloadFile("http://www.dada-data.net/uploads/image/hausmann_abcd.jpg", "XF_Downloads");
 }
}

Download Code 

You can download the full source code from GitHub. If you like this article, do like, share and star the repo in GitHub.

Introduction:  In this article, we will see how to use Zxing Intent Integrator in Xamarin Android Applications. We have seen a lot o...

How to use Zxing Intent Integrator in Xamarin.Android How to use Zxing Intent Integrator in Xamarin.Android

A blog about android developement

tite-banner

Introduction: 

In this article, we will see how to use Zxing Intent Integrator in Xamarin Android Applications. We have seen a lot of articles about how to integrate Zxing Plugin in Android & iOS Applications. But integration of Zxing Intent Integrator is available for Java Android Apps only. So, I have created a Xamarin Library for Xamarin.Android to Zxing Intent Integrator. 

Zxing Intent Integrator: 

This plugin is a port of official Zxing Intent Integrator and it is not just a binding project. I have converted the library code from java to C#. We will see, how to use the same in Coding Part. 

Coding Part: 

Steps: 

I have split this article into 3 steps as in the following. 
Step 1: Creating new Xamarin.Android Projects. 
Step 2: Setting up the plugin for Xamarin.Android Application. 
Step 3: Implementing Zxing Intent Integrator in Xamarin.Android Application.

Step 1: Creating new Xamarin.Android Projects

Create New Project by Selecting New -> Project -> Select Android App and Click OK.

new project

Step 2: Setting up the plugin for Xamarin.Android Application

In this step, we will include the Zxing plugin for Xamarin.Android Project. 
  1. You can download the plugin by clicking here.
  2. Right click on the reference and click add reference.
  3. Then click browse and go to the folder to choose the plugin you downloaded.
add reference 1

add reference 2

Step 3: Implementing Zxing Intent Integrator in Xamarin.Android Application 

  1. I have created a button and added click event.
  2. Then added OnActivityResult Override method as shown below. 
    protected override void OnActivityResult(int requestCode, [GeneratedEnum] Result resultCode, Intent data)
    {
    
     IntentResult result = IntentIntegrator.ParseActivityResult(requestCode, (int)resultCode, data);
     if (result != null)
     {
      if (result.Contents == null)
      {
       Log.Debug("MainActivity", "Cancelled scan");
       Toast.MakeText(this, "Cancelled", ToastLength.Long).Show();
      }
      else
      {
       Log.Debug("MainActivity", "Scanned");
       Toast.MakeText(this, "Scanned: " + result.Contents, ToastLength.Long).Show();
      }
     }
     else
     {
      base.OnActivityResult(requestCode, resultCode, data);
     }
    }
  3. Here we can handle the results returned from Zxing Scanner App.
  4. Then add the following lines in click event, which is help us to call the Zxing app to scan the barcodes.
    button.Click += (s, e) =>
    {
     IntentIntegrator intentIntegrator = new IntentIntegrator(this);
     intentIntegrator.InitiateScan();
    };
  5. The working principle is similar to the official Zxing Java Library.

Full Code

You can find full code here.
namespace ZxingSample
{
    [Activity(Label = "@string/app_name", Theme = "@style/AppTheme", MainLauncher = true)]
    public class MainActivity : AppCompatActivity
    {
        protected override void OnCreate(Bundle savedInstanceState)
        {
            base.OnCreate(savedInstanceState);

            LinearLayout ll = new LinearLayout(this);
            Button button = new Button(this);
            button.Text = "Click to Scan using Zxing";
            button.Click += (s, e) =>
            {
                IntentIntegrator intentIntegrator = new IntentIntegrator(this);
                intentIntegrator.InitiateScan();
            };
            LinearLayout.LayoutParams lp = new LinearLayout.LayoutParams(Android.Views.ViewGroup.LayoutParams.MatchParent,
                Android.Views.ViewGroup.LayoutParams.WrapContent);
            ll.AddView(button, lp);
            SetContentView(ll);
        }

        protected override void OnActivityResult(int requestCode, [GeneratedEnum] Result resultCode, Intent data)
        {

            IntentResult result = IntentIntegrator.ParseActivityResult(requestCode, (int)resultCode, data);
            if (result != null)
            {
                if (result.Contents == null)
                {
                    Log.Debug("MainActivity", "Cancelled scan");
                    Toast.MakeText(this, "Cancelled", ToastLength.Long).Show();
                }
                else
                {
                    Log.Debug("MainActivity", "Scanned");
                    Toast.MakeText(this, "Scanned: " + result.Contents, ToastLength.Long).Show();
                }
            }
            else
            {
                base.OnActivityResult(requestCode, resultCode, data);
            }
        }
    }
}

Demo

zxing app 1

zxing app 2

zxing app 3

zxing app 4

Download Code

You can download the full source code from GitHub. If you like the post, do like and share the article and star the repo on GitHub.

Introduction:  In this article, we will learn How to create our own weather app using Retrofit 2. There are a lot of providers availab...

How to create Weather App using Retrofit 2 in Android How to create Weather App using Retrofit 2 in Android

A blog about android developement

weather

Introduction: 

In this article, we will learn How to create our own weather app using Retrofit 2. There are a lot of providers available to provide weather data. In this tutorial we will use the famous provider “OpenWeatherMap” Api to build our own weather app. 

Coding Part: 

I have detailed the article as in the following steps. 
Step 1: Creating New Project with Empty Activity. 
Step 2: Setting up the Retrofit HTTP Library and Manifest. 
Step 3: Getting App ID from Open Weather API. 
Step 4: Implementation of consumption of Weather API using Retrofit.

Step 1: Creating New Project with Empty Activity.

  1. Creating New Project with Android Studio Open Android Studio and Select Create new project. 
  2. Name the project as your wish and select your activity template.

  3. Click “finish” button to create new project in Android Studio.

Step 2: Setting up the Retrofit Http Library and Manifest

In this part, we will see how to setup the library for the project.
  1. Then add the following lines in app level build.gradle file to apply google services to your project.
    dependencies {
        ...
        implementation 'com.squareup.retrofit2:retrofit:2.0.0'
        implementation 'com.squareup.retrofit2:converter-gson:2.0.0' 
    }
  2. Then click “Sync Now” to setup your project.
  3. Don't forget to add the following permission in your manifest file.
    <uses-permission android:name="android.permission.INTERNET"/>

Step 3: Getting App Id from Open Weather Map

  1. Open OpenWeatherMap Site and sign up for free to get your app id.

  2. You can find or create your app id in API Keys tab of the site after logged in. Find the screenshot for your reference.

Step 4: Implementation of consumption of Weather API using Retrofit

The following API link is used to get the current weather report respect to the geo-coordinates. The Sample API link is
https://openweathermap.org/data/2.5/weather?lat=35&lon=139&appid=b6907d289e10d714a6e88b30761fae22
We will see, how to use the link to access the weather data.
  1. Create an interface file named as “WeatherService.java” and add the following lines
    public interface WeatherService {
        @GET("data/2.5/weather?")
        Call getCurrentWeatherData(@Query("lat") String lat, @Query("lon") String lon, @Query("APPID") String app_id);
    }
  2. Create a class file named as “WeatherResponse.java” and add the following lines. We will get the response as json as in the following.
    {
      "coord": {
        "lon": 139,
        "lat": 35
      },
      "sys": {
        "country": "JP",
        "sunrise": 1369769524,
        "sunset": 1369821049
      },
      "weather": [
        {
          "id": 804,
          "main": "clouds",
          "description": "overcast clouds",
          "icon": "04n"
        }
      ],
      "main": {
        "temp": 289.5,
        "humidity": 89,
        "pressure": 1013,
        "temp_min": 287.04,
        "temp_max": 292.04
      },
      "wind": {
        "speed": 7.31,
        "deg": 187.002
      },
      "rain": {
        "3h": 0
      },
      "clouds": {
        "all": 92
      },
      "dt": 1369824698,
      "id": 1851632,
      "name": "Shuzenji",
      "cod": 200
    }
  3. I have used json to java converter in online to generate the Response class and the equivalent java class should be should be shown below.
    public class WeatherResponse {
    
        @SerializedName("coord")
        public Coord coord;
        @SerializedName("sys")
        public Sys sys;
        @SerializedName("weather")
        public ArrayList weather = new ArrayList();
        @SerializedName("main")
        public Main main;
        @SerializedName("wind")
        public Wind wind;
        @SerializedName("rain")
        public Rain rain;
        @SerializedName("clouds")
        public Clouds clouds;
        @SerializedName("dt")
        public float dt;
        @SerializedName("id")
        public int id;
        @SerializedName("name")
        public String name;
        @SerializedName("cod")
        public float cod;
    }
    
    class Weather {
        @SerializedName("id")
        public int id;
        @SerializedName("main")
        public String main;
        @SerializedName("description")
        public String description;
        @SerializedName("icon")
        public String icon;
    }
    
    class Clouds {
        @SerializedName("all")
        public float all;
    }
    
    class Rain {
        @SerializedName("3h")
        public float h3;
    }
    
    class Wind {
        @SerializedName("speed")
        public float speed;
        @SerializedName("deg")
        public float deg;
    }
    
    class Main {
        @SerializedName("temp")
        public float temp;
        @SerializedName("humidity")
        public float humidity;
        @SerializedName("pressure")
        public float pressure;
        @SerializedName("temp_min")
        public float temp_min;
        @SerializedName("temp_max")
        public float temp_max;
    }
    
    class Sys {
        @SerializedName("country")
        public String country;
        @SerializedName("sunrise")
        public long sunrise;
        @SerializedName("sunset")
        public long sunset;
    }
    
    class Coord {
        @SerializedName("lon")
        public float lon;
        @SerializedName("lat")
        public float lat;
    }
    
  4. The SerializedName annotation is used to parsing the server response and their name & type should be same as the Json Response received from the server.
  5. Then initialize Retrofit to call the weather service. The following code snippet will help us to call the service.
    void getCurrentData() {
            Retrofit retrofit = new Retrofit.Builder()
                    .baseUrl(BaseUrl)
                    .addConverterFactory(GsonConverterFactory.create())
                    .build();
            WeatherService service = retrofit.create(WeatherService.class);
            Call call = service.getCurrentWeatherData(lat, lon, AppId);
            call.enqueue(new Callback() {
                @Override
                public void onResponse(@NonNull Call call, @NonNull Response response) {
                    if (response.code() == 200) {
                        WeatherResponse weatherResponse = response.body();
                        assert weatherResponse != null;
    
                        String stringBuilder = "Country: " +
                                weatherResponse.sys.country +
                                "\n" +
                                "Temperature: " +
                                weatherResponse.main.temp +
                                "\n" +
                                "Temperature(Min): " +
                                weatherResponse.main.temp_min +
                                "\n" +
                                "Temperature(Max): " +
                                weatherResponse.main.temp_max +
                                "\n" +
                                "Humidity: " +
                                weatherResponse.main.humidity +
                                "\n" +
                                "Pressure: " +
                                weatherResponse.main.pressure;
    
                        weatherData.setText(stringBuilder);
                    }
                }
    
                @Override
                public void onFailure(@NonNull Call call, @NonNull Throwable t) {
                    weatherData.setText(t.getMessage());
                }
            });
        }
    
    Here we used Gson Converter and so the json response automatically converted to the respective and the converter will compare the response tree with the serialized name.
  6. Our own developed weather app is ready.

Full Code:

You can find the full code implementation of the app here.
public class MainActivity extends AppCompatActivity {

    public static String BaseUrl = "http://api.openweathermap.org/";
    public static String AppId = "2e65127e909e178d0af311a81f39948c";
    public static String lat = "35";
    public static String lon = "139";

    private TextView weatherData;

    @Override
    protected void onCreate(Bundle savedInstanceState) {
        super.onCreate(savedInstanceState);
        setContentView(R.layout.activity_main);

        weatherData = findViewById(R.id.textView);

        Typeface typeface = Typeface.createFromAsset(getAssets(), "Lato-Bold.ttf");
        FontUtils fontUtils = new FontUtils();
        fontUtils.applyFontToView(weatherData, typeface);

        findViewById(R.id.button).setOnClickListener(new View.OnClickListener() {
            @Override
            public void onClick(View v) {
                getCurrentData();
            }
        });
    }

    void getCurrentData() {
        Retrofit retrofit = new Retrofit.Builder()
                .baseUrl(BaseUrl)
                .addConverterFactory(GsonConverterFactory.create())
                .build();
        WeatherService service = retrofit.create(WeatherService.class);
        Call call = service.getCurrentWeatherData(lat, lon, AppId);
        call.enqueue(new Callback() {
            @Override
            public void onResponse(@NonNull Call call, @NonNull Response response) {
                if (response.code() == 200) {
                    WeatherResponse weatherResponse = response.body();
                    assert weatherResponse != null;

                    String stringBuilder = "Country: " +
                            weatherResponse.sys.country +
                            "\n" +
                            "Temperature: " +
                            weatherResponse.main.temp +
                            "\n" +
                            "Temperature(Min): " +
                            weatherResponse.main.temp_min +
                            "\n" +
                            "Temperature(Max): " +
                            weatherResponse.main.temp_max +
                            "\n" +
                            "Humidity: " +
                            weatherResponse.main.humidity +
                            "\n" +
                            "Pressure: " +
                            weatherResponse.main.pressure;

                    weatherData.setText(stringBuilder);
                }
            }

            @Override
            public void onFailure(@NonNull Call call, @NonNull Throwable t) {
                weatherData.setText(t.getMessage());
            }
        });
    }

}
To know more about Retrofit and Open Weather API
  1. https://openweathermap.org/api
  2. https://square.github.io/retrofit/

Download Code

You can download the full source code of the article in GitHub. If you like this article, do star the repo in GitHub. Hit like the article.

Introduction  In this article, we will learn how to add a download listener to the download files from WebView in Android using Kotlin....

How To Add Download Listener To WebView In Kotlin How To Add Download Listener To WebView In Kotlin

A blog about android developement

Introduction 

In this article, we will learn how to add a download listener to the download files from WebView in Android using Kotlin.

Coding Part

I have divided the coding part into 3 steps as shown in the following.
  1. Creating a new project with Kotlin support. 
  2. Setting up the project with Library. 
  3. Implementing the Download Listener with Kotlin. 
Step 1 - Creating a new project with Kotlin
  1. Open Android Studio and select "Create new project". 
  2. Name the project as per your wish and tick the "Kotlin checkbox support". 
  3. Then, select your Activity type (For Example - Navigation Drawer Activity, Empty Activity, etc.).
  4. Click the “Finish” button to create a new project in Android Studio.
Step 2 - Setting up the project with AndroidManifest
The following lines are added to your Kotlin project by default.
dependencies {   
    …  
   implementation"org.jetbrains.kotlin:kotlin-stdlib-jre7:$kotlin_version"  
   implementation 'com.android.support:appcompat-v7:26.1.0'  
   implementation 'com.android.support:support-annotations:26.1.0'  
   implementation 'com.android.support.constraint:constraint-layout:1.1.3'  
    …  
}
And also, we need to add the INTERNET/WRITE EXTERNAL STORAGE permissions in AndroidManifest.xml
<uses-permission android:name="android.permission.INTERNET"/>
<uses-permission android:name="android.permission.WRITE_EXTERNAL_STORAGE"/>
Step 3 - Implementation of Download Listener with Kotlin
  1. We need to add our WebView to our activity_main.xml file and initialize the WebView control. 
  2. Then, add the following lines.
    webview.loadUrl("http://cbseacademic.in/SQP_CLASSXII_2016_17.html")  
    webview.webViewClient = MyClient()  
      
    webview.setDownloadListener({ url, userAgent, contentDisposition, mimeType, contentLength ->  
        val request = DownloadManager.Request(Uri.parse(url))  
        request.setMimeType(mimeType)  
        request.addRequestHeader("cookie", CookieManager.getInstance().getCookie(url))  
        request.addRequestHeader("User-Agent", userAgent)  
        request.setDescription("Downloading file...")  
        request.setTitle(URLUtil.guessFileName(url, contentDisposition, mimeType))  
        request.allowScanningByMediaScanner()  
        request.setNotificationVisibility(DownloadManager.Request.VISIBILITY_VISIBLE_NOTIFY_COMPLETED)  
        request.setDestinationInExternalFilesDir(this@MainActivity, Environment.DIRECTORY_DOWNLOADS, ".png")  
        val dm = getSystemService(Context.DOWNLOAD_SERVICE) as DownloadManager  
        dm.enqueue(request)  
        Toast.makeText(applicationContext, "Downloading File", Toast.LENGTH_LONG).show()  
    })
    Here, we have to add the download manager request with media scanner to notify that the file is downloading.
  3. Request.VISIBILITY_VISIBLE_NOTIFY_COMPLETED is used to notify a user when the download is completed.
Full Code of MainActivity
You can find the full code implementation of MainActivty.kt in the following code.
class MainActivity : AppCompatActivity() {  
  
    @SuppressLint("SetJavaScriptEnabled")  
    override fun onCreate(savedInstanceState: Bundle?) {  
        super.onCreate(savedInstanceState)  
        setContentView(R.layout.activity_main)  
  
        webview.loadUrl("http://cbseacademic.in/SQP_CLASSXII_2016_17.html")  
        webview.webViewClient = MyClient()  
  
        webview.setDownloadListener({ url, userAgent, contentDisposition, mimeType, contentLength ->  
            val request = DownloadManager.Request(Uri.parse(url))  
            request.setMimeType(mimeType)  
            request.addRequestHeader("cookie", CookieManager.getInstance().getCookie(url))  
            request.addRequestHeader("User-Agent", userAgent)  
            request.setDescription("Downloading file...")  
            request.setTitle(URLUtil.guessFileName(url, contentDisposition, mimeType))  
            request.allowScanningByMediaScanner()  
            request.setNotificationVisibility(DownloadManager.Request.VISIBILITY_VISIBLE_NOTIFY_COMPLETED)  
            request.setDestinationInExternalFilesDir(this@MainActivity, Environment.DIRECTORY_DOWNLOADS, ".png")  
            val dm = getSystemService(Context.DOWNLOAD_SERVICE) as DownloadManager  
            dm.enqueue(request)  
            Toast.makeText(applicationContext, "Downloading File", Toast.LENGTH_LONG).show()  
        })  
  
    }  
  
    class MyClient : WebViewClient() {  
        override fun shouldOverrideUrlLoading(view: WebView, Url: String): Boolean {  
            view.loadUrl(Url)  
            return true  
  
        }  
    }  
  
    override fun onBackPressed() {  
        if (webview.canGoBack())  
            webview.goBack()  
        else  
            super.onBackPressed()  
  
    }  
}

Download Code:

You can download the full source code of the article in GitHub. If you like this article, do star the repo in GitHub. Hit like the article.