Showing posts with label Xamarin. Show all posts

Introduction: In this tutorial, we will learn how to use master detail page using Fresh MVVM with FreshNavigationContainer. It has some w...

Custom Master Detail Page in Xamarin.Forms using Fresh MVVM Custom Master Detail Page in Xamarin.Forms using Fresh MVVM

A blog about android developement

Xamarin

Introduction:

In this tutorial, we will learn how to use master detail page using Fresh MVVM with FreshNavigationContainer. It has some work around for creating master detail page more than creating master detail page using FreshMasterContainer. In my previous tutorials, we have learned the method to create master detail page using Fresh Master Container. To know more, visit my previous article.

Kindly refer my previous article on Fresh MVVM to know the basics & rules of Fresh MVVM.

Coding Part:

Steps:

I have split this part into 3 steps as in the following.

  1. Creating new Xamarin.Forms Projects.
  2. Setting up the plugin for Xamarin.Forms Application.
  3. Implementing Fresh MVVM.

Step 1: Creating new Xamarin.Forms Projects

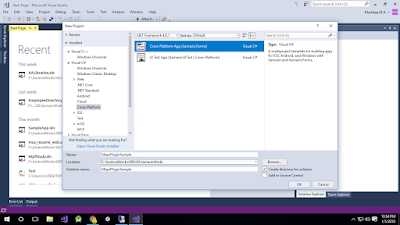
Create New Project by Selecting New -> Project -> Select Xamarin Cross Platform App and Click OK.
Then Select Android and iOS Platforms as shown below with Code Sharing Strategy as PCL or .Net Standard and Click OK.

Step 2: Setting up the plugin for Xamarin.Forms Application

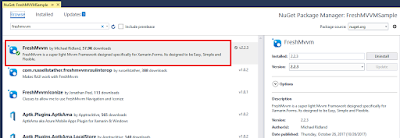
We will start coding for Fresh MVVM. Create New Xamarin Forms Project. Open Nuget Package Manager against the solution and do search for Fresh MVVM Plugin or Paste the following Nuget Installation.
Install-Package FreshMvvm -Version 2.2.3
Click Install to install this Plugin against your PCL Project or .NET standard Project.

Step 3: Implementing Fresh MVVM.

  1. Create your XAML page (view) with name ended up with “Page”.
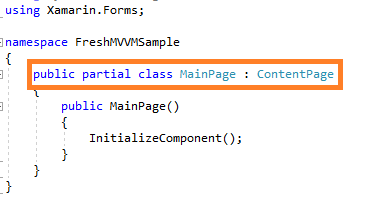
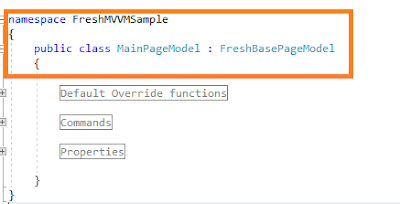
  2. Create PageModel by create Class name ended with “PageModel” and inherited with “FreshBasePageModel” as shown below screenshot.

In the same way, I have created pages “MyMasterDetailPage”, “MasterPage”, “Detail1Page” and “Detail2Page” with two respective models “MyMasterDetailPageModel”, “MasterPageModel”, “Detail1PageModel” and “Detail2PageModel”.

Here,
MyMasterDetailPagecontainer to have both Master & Detail page
MasterPageMaster or Menu Page
Detail1Page, Detail2PageDetail pages of the Master detail page

Set MainPage:

We need to set the MainPageModel as MainPage using FreshNavigationConatiner.

  1. Open App.xaml.cs or App.cs and set MainPage.
    // To set MainPage for the Application
    var page = FreshPageModelResolver.ResolvePageModel();
    var basicNavContainer = new FreshNavigationContainer(page);
    MainPage = basicNavContainer;
  2. Then add button with command for opening the MasterDetailPage from MainPage.
    public Command GotoSecondPageCommand
    {
        get
        {
            return new Command(async () =>
            {
                await CoreMethods.PushPageModel();
            });
        }
    }
  3. Open MyMasterDetailPage and add Master, Detail page to the constructor of the page like below.
    public MyMasterDetailPage()
    {
        InitializeComponent();
    
        NavigationPage.SetHasNavigationBar(this, false);
    
        Master = FreshPageModelResolver.ResolvePageModel();
        Detail = new NavigationPage(FreshPageModelResolver.ResolvePageModel());
    }
  4. Then click “Run” to see your Custom Master Detail Page using FreshMVVM with FreshNavigationContainer.

By this way, we can have Navigation Service & Stack for all type of Pages. Kindly find the screenshot for your reference.

MainPageMaster Page(Detail)Master Page(Master)

Download Code

You can download the code from GitHub. If you have doubt, feel free to post comment. If you like this article and is useful to you, do like, share the article & star the repository on GitHub.

Introduction: In this tutorial, we will learn how create Tabbed Page in Xamarin.Forms using Fresh MVVM. We already learned how to create ...

Tabbed Page in Xamarin.Forms using Fresh MVVM Tabbed Page in Xamarin.Forms using Fresh MVVM

A blog about android developement

Xamarin


Introduction:

In this tutorial, we will learn how create Tabbed Page in Xamarin.Forms using Fresh MVVM. We already learned how to create your master details page in my previous tutorials. If you are new to Fresh MVVM, You can read my previous article here.

Articles of FreshMVVM:

  1. MVVM Databinding in Xamarin.Forms using Fresh MVVM.
  2. Master Detail Page in Xamarin.Forms using Fresh MVVM.

Coding Part:

Steps:
I have split this part into 3 steps as in the following.
  1. Creating new Xamarin.Forms Projects.
  2. Setting up the plugin for Xamarin.Forms Application.
  3. Implementing Fresh MVVM Tabbed Page.

Step 1: Creating new Xamarin.Forms Projects

Create New Project by Selecting New -> Project -> Select Xamarin Cross Platform App and Click OK.
Then Select Android and iOS Platforms as shown below with Code Sharing Strategy as PCL or .Net Standard and Click OK.

Step 2: Setting up the plugin for Xamarin.Forms Application

We will start coding for Fresh MVVM. Create New Xamarin Forms Project. Open Nuget Package Manager against the solution and do search for Fresh MVVM Plugin or Paste the following Nuget Installation.
Install-Package FreshMvvm -Version 2.2.3
Click Install to install this Plugin against your PCL Project or .NET standard Project.

Step 3: Implementing Fresh MVVM Tabbed Page

  1. Create your XAML page (view) with name ended up with “Page”.
  2. Create PageModel by create Class name ended with “PageModel” and inherited with “FreshBasePageModel” as shown below screenshot.
  3. In the same way, I have created two pages “Detail1Page” and “Detail2Page” with two respective page models “Detail1PageModel” and “Detail2PageModel”.
Set MainPage:
To create Fresh MVVM Tabbed Page as MainPage, we should use Fresh Tabbed Navigation Container with the following code. Open App.xaml.cs or App.cs and set MainPage.
var tabbedNavigation = new FreshTabbedNavigationContainer();
tabbedNavigation.AddTab("First Tab", null);
tabbedNavigation.AddTab("Second Tab", null);
MainPage = tabbedNavigation;
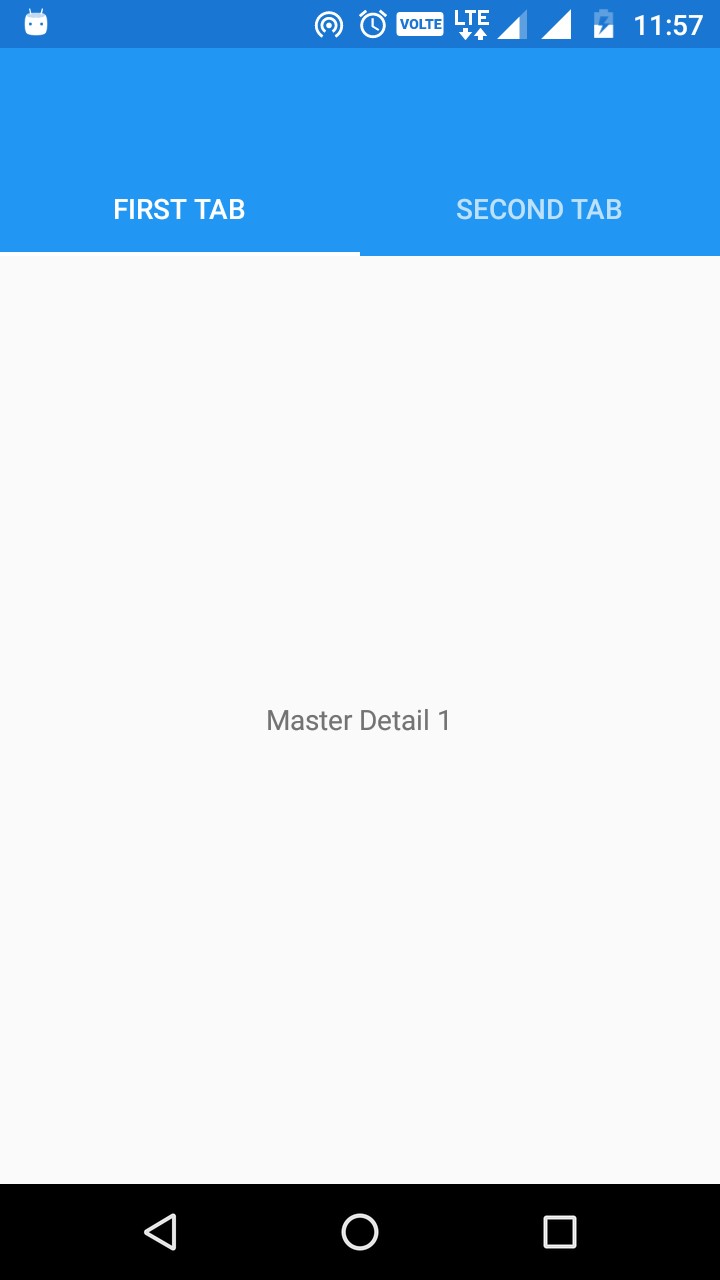
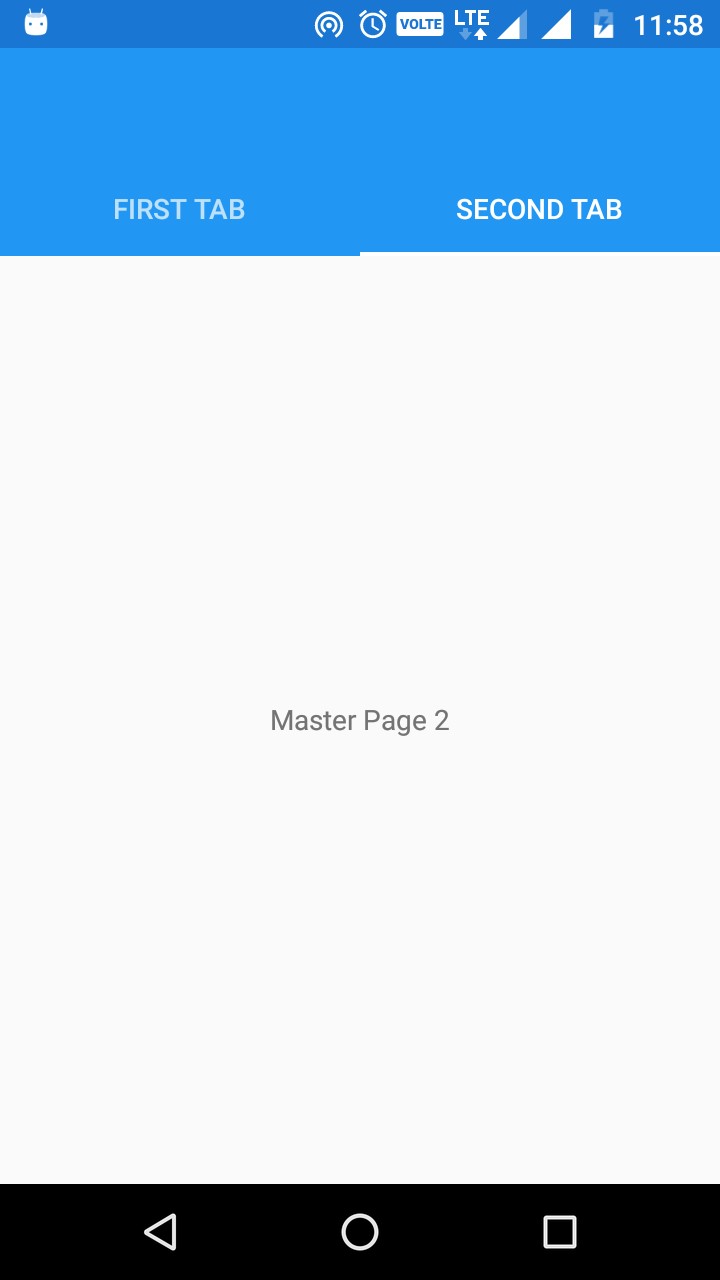
  • Then Click Run, your Tabbed Page will be look like as on the below screenshot.
  • Here, we will not discuss about navigation between pages. If you want to know, you can see my previous article on Fresh MVVM.
Full Code for App.xaml.cs:
You can find the code for App.xaml.cs below
public partial class App : Application
{
    public App()
    {
        try
        {
            InitializeComponent();
            var tabbedNavigation = new FreshTabbedNavigationContainer();
           tabbedNavigation.AddTab("First Tab", null);
           tabbedNavigation.AddTab("Second Tab", null);
           MainPage = tabbedNavigation;
        }
        catch (Exception ex)
        {

        }
    }

    protected override void OnStart()
    {
        // Handle when your app starts
    }

    protected override void OnSleep()
    {
        // Handle when your app sleeps
    }

    protected override void OnResume()
    {
        // Handle when your app resumes
    }
}

Download Code

You can download the code from GitHub. If you have doubt, feel free to post comment. If you like this article and is useful to you, do like, share the article & star the repository on GitHub.

Introduction: In this tutorial, we will learn how to perform MVVM approach in Xamarin.Forms using Fresh MVVM. MVVM approach is the b...

Master Detail Page in Xamarin.Forms using Fresh MVVM Master Detail Page in Xamarin.Forms using Fresh MVVM

A blog about android developement

Xamarin


Introduction:

In this tutorial, we will learn how to perform MVVM approach in Xamarin.Forms using Fresh MVVM. MVVM approach is the best approach for Xamarin.Forms and WPF Applications. There are a lot of MVVM plugins or libraries like FreshMVVM, MVVMCross, Prism, etc. available to simplify MVVM implementations.

FreshMVVM:

FreshMVVM is designed to perform MVVM easy and simple with Xamarin.Forms Application. It is created Michael Ridland. It has certain rules to perform MVVM Databinding. You can find the plugin from GitHub and Nuget.

Kindly refer my previous article on Fresh MVVM to know the basics & rules of Fresh MVVM.

Coding Part:

Steps:
I have split this part into 3 steps as in the following.
  1. Creating new Xamarin.Forms Projects.
  2. Setting up the plugin for Xamarin.Forms Application.
  3. Implementing Fresh MVVM.

Step 1: Creating new Xamarin.Forms Projects

Create New Project by Selecting New -> Project -> Select Xamarin Cross Platform App and Click OK.
Then Select Android and iOS Platforms as shown below with Code Sharing Strategy as PCL or .Net Standard and Click OK.

Step 2: Setting up the plugin for Xamarin.Forms Application

We will start coding for Fresh MVVM. Create New Xamarin Forms Project. Open Nuget Package Manager against the solution and do search for Fresh MVVM Plugin or Paste the following Nuget Installation.
Install-Package FreshMvvm -Version 2.2.3
Click Install to install this Plugin against your PCL Project or .NET standard Project.

Step 3: Implementing Fresh MVVM.

  1. Create your XAML page (view) with name ended up with “Page”.
  2. Create PageModel by create Class name ended with “PageModel” and inherited with “FreshBasePageModel” as shown below screenshot.
  3. In the same way, I have created two pages “Detail1Page” and “Detail2Page” with two respective page models “Detail1PageModel” and “Detail2PageModel”.
Set MainPage:
To create Fresh MVVM Master Detail Page as MainPage, we should use Fresh Master Detail Navigation Container with the following code. Open App.xaml.cs or App.cs and set MainPage.
var masterNavigation = new FreshMasterDetailNavigationContainer();
masterNavigation.Init("Menu");
masterNavigation.AddPage("First Page", null);
masterNavigation.AddPage("Second Page", null);
MainPage = masterNavigation;
  • Here, we will not discuss about navigation between pages. If you want to know, you can see my previous article on Fresh MVVM.
Full Code for App.xaml.cs:
You can find the code for App.xaml.cs below
public partial class App : Application
{
    public App()
    {
        try
        {
            InitializeComponent();
            var masterNavigation = new FreshMasterDetailNavigationContainer();
            masterNavigation.Init("Menu");
            masterNavigation.AddPage("First Page", null);
            masterNavigation.AddPage("Second Page", null);
            MainPage = masterNavigation;
        }
        catch (Exception ex)
        {

        }
    }

    protected override void OnStart()
    {
        // Handle when your app starts
    }

    protected override void OnSleep()
    {
        // Handle when your app sleeps
    }

    protected override void OnResume()
    {
        // Handle when your app resumes
    }
}

Download Code

You can download the code from GitHub. If you have doubt, feel free to post comment. If you like this article and is useful to you, do like, share the article & star the repository on GitHub.

In this article, we will learn how to download any files from online server and save the same to the local directory of the Android an...

How to download files in Xamarin.Forms How to download files in Xamarin.Forms

A blog about android developement

Xamarin

xfdownload

In this article, we will learn how to download any files from online server and save the same to the local directory of the Android and iOS Phones.

Platform Support:

Here, we have used DependencyService to download any file from server path. Because, we cannot download any file directly in Xamarin.Forms. We will see the DependencyService for Android and iOS Platforms. It is similar to UWP with slight changes.

DependencyService:

Xamarin.Forms allows developers to define behaviour in platform-specific projects. DependencyService then finds the right platform implementation, allowing shared code to access the native functionality. To know more about DependencyService Click Here.  Without much introduction, we will skip into the coding part of this article.

Coding Part:

Steps: 

I have explained the method to create DependencyService with the steps as shown in the following. 
Step 1: Creating new Xamarin.Forms Projects.
Step 2: Setting up AndroidManifest and info.plist
Step 3: Creating a Dependency Service for Android and iOS Platforms.
Step 4: Implementing the functionality to download the file in PCL.

Step 1 Creating new Xamarin.Forms Projects.

Create New Project by Selecting New -> Project -> Select Xamarin Cross Platform App and Click OK.
pro1

Then Select Android and iOS Platforms as shown below with Code Sharing Strategy as PCL or .Net Standard and Click OK.
pro2

Step 2 Setting up AndroidManifest and info.plist

Before starting, we need to make some setup respective to the Platforms.
For Android:
  1. Expand your Android Project and open Properties.
  2. Then add or check the permissions.(INTERNET,WRITE EXTERNAL STORAGE)
  3. Then click Save.
For iOS:
  1. Expand your iOS Project and Open your Info.plist file with XML Editor.
  2. Then add the following Permissions.
    <key>NSPhotoLibraryAddUsageDescription </key>
    <string>Need permission to save files.</string>
  3. It provides permission to save file.
    <key>NSPhotoLibraryUsageDescription</key>
    <string>Need permission to access files.</string>
  4. It provides permission to access files.
From iOS 11, Separate Permission Patterns are followed for saving and Accessing the Storage or Gallery.

Step 3 Creating Dependency Service by Platform wise.

In Xamarin.Forms, we need to go with dependency service to download files.
  1. First we need to create an interface in your PCL or Shared Projects. In my case, I have created an Interface named as “IDownloader.cs”.
  2. Then Paste the following code in that.
    public interface IDownloader
    {
     void DownloadFile(string url, string folder);
     event EventHandler OnFileDownloaded;
    }
  3. Here, I have create a custom event handler to notify app users about file download. You have create a class named as “DownloadEventArgs” and Paste the following code.
    public class DownloadEventArgs : EventArgs
    {
     public bool FileSaved = false;
     public DownloadEventArgs(bool fileSaved)
     {
      FileSaved = fileSaved;
     }
    }

For Android:

  1. Create a class named as “AndroidDownloader.cs” in your Android Project and implements the class with “IDownloader” interface created in your Portable Library. 
  2. We can use WebClient to download any file from the given URL. WebClient is used for both Android and iOS Platforms to download files.
  3. You can find the code used in Android Platform.
    public class AndroidDownloader : IDownloader
    {
     public event EventHandler OnFileDownloaded;
    
     public void DownloadFile(string url, string folder)
     {
      string pathToNewFolder = Path.Combine(Android.OS.Environment.ExternalStorageDirectory.AbsolutePath, folder);
      Directory.CreateDirectory(pathToNewFolder);
    
      try
      {
       WebClient webClient = new WebClient();
       webClient.DownloadFileCompleted += new AsyncCompletedEventHandler(Completed);
       string pathToNewFile = Path.Combine(pathToNewFolder, Path.GetFileName(url));
       webClient.DownloadFileAsync(new Uri(url), pathToNewFile);
      }
      catch (Exception ex)
      {
       if (OnFileDownloaded != null)
        OnFileDownloaded.Invoke(this, new DownloadEventArgs(false));
      }
     }
    
     private void Completed(object sender, AsyncCompletedEventArgs e)
     {
      if (e.Error != null)
      {
       if (OnFileDownloaded != null)
        OnFileDownloaded.Invoke(this, new DownloadEventArgs(false));
      }
      else
      {
       if (OnFileDownloaded != null)
        OnFileDownloaded.Invoke(this, new DownloadEventArgs(true));
      }
     }
    }
  4. Here, WebClient has an async event for notifying the download event completion.
  5. The Download event is notified by invoking the custom event created with Dependency Service from Android Platform code.

For iOS:

  1. Create a class named as “iOSDownloader.cs” in your iOS Project and implements the class with “IDownloader” interface created in your Portable Library. 
  2. We can use WebClient to download any file from the given URL. WebClient is used for both Android and iOS Platforms to download files.
  3. You can find the code used in iOS Platform.
    public class IosDownloader : IDownloader
    {
     public event EventHandler OnFileDownloaded;
    
     public void DownloadFile(string url, string folder)
     {
      string pathToNewFolder = Path.Combine(Environment.GetFolderPath(Environment.SpecialFolder.Personal), folder);
      Directory.CreateDirectory(pathToNewFolder);
    
      try
      {
       WebClient webClient = new WebClient();
       webClient.DownloadFileCompleted += new AsyncCompletedEventHandler(Completed);
       string pathToNewFile = Path.Combine(pathToNewFolder, Path.GetFileName(url));
       webClient.DownloadFileAsync(new Uri(url), pathToNewFile);
      }
      catch (Exception ex)
      {
       if (OnFileDownloaded != null)
        OnFileDownloaded.Invoke(this, new DownloadEventArgs(false));
      }
     }
    
     private void Completed(object sender, AsyncCompletedEventArgs e)
     {
      if (e.Error != null)
      {
       if (OnFileDownloaded != null)
        OnFileDownloaded.Invoke(this, new DownloadEventArgs(false));
      }
      else
      {
       if (OnFileDownloaded != null)
        OnFileDownloaded.Invoke(this, new DownloadEventArgs(true));
      }
     }
    }
  4. Here, WebClient has an async event for notifying the download event completion.
  5. The Download event is notified by invoking the custom event created with Dependency Service from iOS Platform code.
Don’t forget to add the following lines above the namespace of your Dependency Service classes.
[assembly: Dependency(typeof(Dependency_Class_Name))]

Step 4: Implementing the functionality to download the file in PCL

The following code shows the following points – How to subscribe the download event. – How to call the download function.
public partial class MainPage : ContentPage
{
 IDownloader downloader = DependencyService.Get();
 public MainPage()
 {
  InitializeComponent();
  downloader.OnFileDownloaded += OnFileDownloaded;
 }

 private void OnFileDownloaded(object sender, DownloadEventArgs e)
 {
  if (e.FileSaved)
  {
   DisplayAlert("XF Downloader", "File Saved Successfully", "Close");
  }
  else
  {
   DisplayAlert("XF Downloader", "Error while saving the file", "Close");
  }
 }

 private void DownloadClicked(object sender, EventArgs e)
 {
  downloader.DownloadFile("http://www.dada-data.net/uploads/image/hausmann_abcd.jpg", "XF_Downloads");
 }
}

Download Code 

You can download the full source code from GitHub. If you like this article, do like, share and star the repo in GitHub.

Introduction:  In this article, we will see how to use Zxing Intent Integrator in Xamarin Android Applications. We have seen a lot o...

How to use Zxing Intent Integrator in Xamarin.Android How to use Zxing Intent Integrator in Xamarin.Android

A blog about android developement

Xamarin

tite-banner

Introduction: 

In this article, we will see how to use Zxing Intent Integrator in Xamarin Android Applications. We have seen a lot of articles about how to integrate Zxing Plugin in Android & iOS Applications. But integration of Zxing Intent Integrator is available for Java Android Apps only. So, I have created a Xamarin Library for Xamarin.Android to Zxing Intent Integrator. 

Zxing Intent Integrator: 

This plugin is a port of official Zxing Intent Integrator and it is not just a binding project. I have converted the library code from java to C#. We will see, how to use the same in Coding Part. 

Coding Part: 

Steps: 

I have split this article into 3 steps as in the following. 
Step 1: Creating new Xamarin.Android Projects. 
Step 2: Setting up the plugin for Xamarin.Android Application. 
Step 3: Implementing Zxing Intent Integrator in Xamarin.Android Application.

Step 1: Creating new Xamarin.Android Projects

Create New Project by Selecting New -> Project -> Select Android App and Click OK.

new project

Step 2: Setting up the plugin for Xamarin.Android Application

In this step, we will include the Zxing plugin for Xamarin.Android Project. 
  1. You can download the plugin by clicking here.
  2. Right click on the reference and click add reference.
  3. Then click browse and go to the folder to choose the plugin you downloaded.
add reference 1

add reference 2

Step 3: Implementing Zxing Intent Integrator in Xamarin.Android Application 

  1. I have created a button and added click event.
  2. Then added OnActivityResult Override method as shown below. 
    protected override void OnActivityResult(int requestCode, [GeneratedEnum] Result resultCode, Intent data)
    {
    
     IntentResult result = IntentIntegrator.ParseActivityResult(requestCode, (int)resultCode, data);
     if (result != null)
     {
      if (result.Contents == null)
      {
       Log.Debug("MainActivity", "Cancelled scan");
       Toast.MakeText(this, "Cancelled", ToastLength.Long).Show();
      }
      else
      {
       Log.Debug("MainActivity", "Scanned");
       Toast.MakeText(this, "Scanned: " + result.Contents, ToastLength.Long).Show();
      }
     }
     else
     {
      base.OnActivityResult(requestCode, resultCode, data);
     }
    }
  3. Here we can handle the results returned from Zxing Scanner App.
  4. Then add the following lines in click event, which is help us to call the Zxing app to scan the barcodes.
    button.Click += (s, e) =>
    {
     IntentIntegrator intentIntegrator = new IntentIntegrator(this);
     intentIntegrator.InitiateScan();
    };
  5. The working principle is similar to the official Zxing Java Library.

Full Code

You can find full code here.
namespace ZxingSample
{
    [Activity(Label = "@string/app_name", Theme = "@style/AppTheme", MainLauncher = true)]
    public class MainActivity : AppCompatActivity
    {
        protected override void OnCreate(Bundle savedInstanceState)
        {
            base.OnCreate(savedInstanceState);

            LinearLayout ll = new LinearLayout(this);
            Button button = new Button(this);
            button.Text = "Click to Scan using Zxing";
            button.Click += (s, e) =>
            {
                IntentIntegrator intentIntegrator = new IntentIntegrator(this);
                intentIntegrator.InitiateScan();
            };
            LinearLayout.LayoutParams lp = new LinearLayout.LayoutParams(Android.Views.ViewGroup.LayoutParams.MatchParent,
                Android.Views.ViewGroup.LayoutParams.WrapContent);
            ll.AddView(button, lp);
            SetContentView(ll);
        }

        protected override void OnActivityResult(int requestCode, [GeneratedEnum] Result resultCode, Intent data)
        {

            IntentResult result = IntentIntegrator.ParseActivityResult(requestCode, (int)resultCode, data);
            if (result != null)
            {
                if (result.Contents == null)
                {
                    Log.Debug("MainActivity", "Cancelled scan");
                    Toast.MakeText(this, "Cancelled", ToastLength.Long).Show();
                }
                else
                {
                    Log.Debug("MainActivity", "Scanned");
                    Toast.MakeText(this, "Scanned: " + result.Contents, ToastLength.Long).Show();
                }
            }
            else
            {
                base.OnActivityResult(requestCode, resultCode, data);
            }
        }
    }
}

Demo

zxing app 1

zxing app 2

zxing app 3

zxing app 4

Download Code

You can download the full source code from GitHub. If you like the post, do like and share the article and star the repo on GitHub.

Introduction: In this article, we will learn how to send Mail directly from Xamarin Android Application without any Intents. For this, ...

How to Send Mail directly from Android Application in Xamarin.Android How to Send Mail directly from Android Application in Xamarin.Android

A blog about android developement

Xamarin


Introduction:

In this article, we will learn how to send Mail directly from Xamarin Android Application without any Intents. For this, we can MailKit to send mail directly.

MailKit:

MailKit is a cross-platform mail client library built on top of MimeKit. MailKit is a personal open source project that I have put thousands of hours into perfecting with the goal of making it the very best email framework for .NET.

Coding Part:

Steps:

I have split this article into 3 steps as in the following.
Step 1: Creating new Xamarin.Android Projects.
Step 2: Setting up the plugin for Xamarin.Android Application.
Step 3: Implementing Mail functionalities in Xamarin.Android Application.

Step 1: Creating new Xamarin.Android Projects

Create New Project by Selecting New  Project  Select Android App and Click OK.

fig1

Step 2: Setting up the plugin for Xamarin.Android Application

In this step, we will include the Mailkit plugin for Xamarin.Android Project. Open Nuget Package Manager against the project and do search for Mailkit and click install to add the library or Paste the following in Package Manager Console to install the Nuget plugin.

Install-Package MailKit
fig2

Step 3: Implementing Mail Functionalities in Xamarin.Android Application

In this part, we will see how to implement Mail functions to send mail.

  • Open your MainActivity.cs and Import the Following Packages.
    using MimeKit;
    using MailKit.Net.Smtp;
    
  • Then add/create an Async task class named as “MailAsyncTask” and add implement the override functions.
    • OnPreExecute
    • OnPostExecute
    • DoInBackground
  • Then add/paste the following code in DoInBackground method.
    var message = new MimeMessage();
    message.From.Add(new MailboxAddress("From", mainActivity.edtFrom.Text));
    message.To.Add(new MailboxAddress("To", mainActivity.edtTo.Text));
    message.Subject = mainActivity.edtSubject.Text;
    
    message.Body = new TextPart("plain")
    {
     Text = mainActivity.edtMessage.Text
    };
    
    using (var client = new SmtpClient())
    {
     // For demo-purposes, accept all SSL certificates (in case the server supports STARTTLS)
     client.ServerCertificateValidationCallback = (s, c, h, e) => true;
    
     client.Connect(host, port, false);
    
     // Note: only needed if the SMTP server requires authentication
     client.Authenticate(username, password);
     client.Send(message);
     client.Disconnect(true);
    }
  • Here, we should provide host address, port and username & password if the SMTP server needs authentication.
  • The Mail Connections needed to be run with separate thread. So, I had done the call with “AsyncTask”. You can find the full code below.

Full code of the MailAsyncClass:

The following code shows how to implement Direct Mail functions in Xamarin.Android with AsyncTask.

class MailAsyncTask : AsyncTask
{
 string username = "mail-id or username", password = "password", host = "smtp.gmail.com";
 int port = 25;
 MainActivity mainActivity;
 ProgressDialog progressDialog;

 public MailAsyncTask(MainActivity activity)
 {
  mainActivity = activity;
  progressDialog = new ProgressDialog(mainActivity);
  progressDialog.SetMessage("Sending...");
  progressDialog.SetCancelable(false);
 }

 protected override void OnPreExecute()
 {
  base.OnPreExecute();
  progressDialog.Show();
 }

 protected override Java.Lang.Object DoInBackground(params Java.Lang.Object[] @params)
 {
  try
  {
   var message = new MimeMessage();
   message.From.Add(new MailboxAddress("From", mainActivity.edtFrom.Text));
   message.To.Add(new MailboxAddress("To", mainActivity.edtTo.Text));
   message.Subject = mainActivity.edtSubject.Text;

   message.Body = new TextPart("plain")
   {
    Text = mainActivity.edtMessage.Text
   };

   using (var client = new SmtpClient())
   {
    // For demo-purposes, accept all SSL certificates (in case the server supports STARTTLS)
    client.ServerCertificateValidationCallback = (s, c, h, e) => true;

    client.Connect(host, port, false);

    // Note: only needed if the SMTP server requires authentication
    client.Authenticate(username, password);
    client.Send(message);
    client.Disconnect(true);
   }
   return "Successfully Sent";
  }
  catch (System.Exception ex)
  {
   return ex.Message;
  }
 }

 protected override void OnPostExecute(Java.Lang.Object result)
 {
  base.OnPostExecute(result);
  progressDialog.Dismiss();
  mainActivity.edtFrom.Text = null;
  mainActivity.edtTo.Text = null;
  mainActivity.edtSubject.Text = null;
  mainActivity.edtMessage.Text = null;
  Toast.MakeText(mainActivity, "Email Succesfully Sent...", ToastLength.Short).Show();
 }
}

The Mail class can be executed by the following code

new MailAsyncTask(this).Execute();

Download Code:

You can download the full source code of the article in GitHub. If you like this article, do star the repo in GitHub. Hit like the article.

In this article, we will learn to load Base64 String Images into Images in Xamarin.Forms without using any External Plugins like FFMpe...

Loading Base64 Images In Xamarin.Forms Loading Base64 Images In Xamarin.Forms

A blog about android developement

Xamarin


In this article, we will learn to load Base64 String Images into Images in Xamarin.Forms without using any External Plugins like FFMpeg Image Loader Plugin.

Base64 Images

Base64 is a group of similar binary-to-text encoding schemes that represent binary data in an ASCII string format by translating it into a radix-64 representation. The term Base64 originates from a specific MIME content transfer encoding. To know more about Base64 Click Here.

Platform Support

The approach used here is done with Portable Library. So, it supports all the 3 (Android, iOS, and UWP) Platforms supported by Xamarin.Forms.
Without much introduction, we will skip into the coding part of this article.

Steps

I have explained the method to load base64 image in Image with 3 steps as shown below.
Step 1 - Creating new Xamarin.Forms Projects.
Step 2 - Creating a user interface with Xamarin.Forms.
Step 3 - Implementing the functionality to load Base64 Image.
Step 1 Creating new Xamarin.Forms Projects.
Create New Project by Selecting New >> Project >> Select Xamarin Cross-Platform App and Click OK.
Xamarin
Then Select Android and iOS Platforms as shown below with Code Sharing Strategy as PCL or .NET Standard and Click OK.
Xamarin
Step 2 Creating a user interface with Xamarin.Forms
Add Image Control to your Page, and here, I am going to add the control in MainPage.xaml. You can paste the codes shown below to create user interface for your page.
<?xml version="1.0" encoding="utf-8" ?>  
<ContentPage xmlns="http://xamarin.com/schemas/2014/forms" 
 xmlns:x="http://schemas.microsoft.com/winfx/2009/xaml" 
 xmlns:local="clr-namespace:Base64" 
 x:Class="Base64.MainPage">  
    <ContentPage.Content>  
        <Image x:Name="xfImage" 
   VerticalOptions="Center"
   HorizontalOptions="Center" /> 
 </ContentPage.Content>  
</ContentPage>
Step 3 implementing the functionality to load Base64 Image
In Xamarin.Forms, we can assign the source for Images by many ways like File Path, Image URL, From Resource Folder or Stream of Image.
We can convert the Base64 string into Stream of Image. That is array of Bytes (byte[]). We will use this method to assign Base64 image to Image Controls using the following code.
byte[] Base64Stream = Convert.FromBase64String(base64Image);  
xfImage.Source = ImageSource.FromStream(() => new MemoryStream(Base64Stream));
Full Code of MainPage.xaml.cs
namespace Base64 {  
    public partial class MainPage: ContentPage {  
        string base64Image = "iVBORw0KGgoAAAANSUhEUgAAAHwAAAB8CAMAAACcwCSMAAAAZlBMVEUAAAD///+cnJz7+/vz8/MdHR329vbw8PBRUVHh4eEaGhqsrKzn5+dZWVnk5OQyMjLZ2dmOjo6ysrIoKCjR0dFiYmKjo6NKSkoNDQ3ExMQ4ODi5ubmHh4cWFhbLy8tBQUF6enpvb2/Qp8GOAAAFzUlEQVRogcWb56KyOhBFIyBFQUGkiQXe/yVvQPFQUvYEvN/+q7CYlMnMJGG7fyhm8pDrnZ71Mbd65cf6efLc/wPuhlXeRLf0wUZ6pLeoyauQ+gUkuFPd/ZRJlfr3yvkN3L20pRw8qGwvuP0g3K0aPXhQU4F8CB5aLxzd6WWFG8HDRNHPMqUJgNfCPRP0G++thNtHQ3SPP9pr4NfCHN2puBrDvWYdulOjansFvLqtZzN2qwzgtrUFupMl7XkZPGy3YjPWymadBB4TvYpar5gCrwEvTlFZ4/DjtuhORxT+A7aYLoD/hC2kL+E/YovoC/jlV2zGLjr483dsxp5qeLBiEdMrDVRwz/8lmzHfU8DvlDelLz/yX7SmusvhhIEe5XHYLRh2GOcRgX6UwWPUqT6s08SCUwK74zKWwFELmuUqFTYoPRLDwQX8JY4O6jNIt0Tw00P/IJcvWR53MThTHn9d9gdvoEezQAR+Nz1Ib5bwK/TgSxUPBmDQ9w1pB7gNffZDbndvANhzQ1A3wGvoMUuG/SiH3sKGuOYDd6FpVuiybxtLMiJ3AscMX6yJC4ELcj2BQ4b7+rKDg425aAzHhrquxzsl0Js+A/4Nb5AHynksIFKFefnmD25DD9y0+TbXCfSy9heODbcIqbQ44OpUf+EZ9P9GjX3LbjB4NsA97P8JAoeDIe8DBycnMtjh4d77jA4OZsPbWt6+4R44QLE+R/P6s9fD0Txh09HeZxAMXoq2neeM5T0cLoBs6OFY3+ls58AVkA19O9fL4fATnHP4+nb38FpOeuJwvKGA9Rxz1L3KisMJOVKhqaXudpQi1pHDKcU+nZ8hFQ4tDm8I/3/IMoa3CD3IOqfF4AytV6Eq4RMrhxGH057I5PSQZAafaxxOLIQUsrwhoNbm0x2z99RnJFkquWK6t+lwVjZL44OG+hZDODf+PsXHd4OXmMK59ZEV9Ju3rhfnkVmN2hjeKS2yNivMC3er4Gv1r+E7OPSYqTy//CiLipvp15+5kyHv2z3SqLWqZ8xHnG27Thhfq2PTFlhVYqSCw7F0ZdA+S56xIJK0w+ulIXpqDqfUW8/WVRXCnmqKJXcOR4NX7lrUO6O9wiNcuM45HIx8brN6q1R2lWHdX3P49QD88ZCA6E5ujVh/uHK4B5RRsqc2eps2vqW3iOcgbGdrY4CDcEdOrUA79CK7y1h0cX5GaPGRjhrjkz5d0qTnidHJI66ruj8vPTxQfmJuiOYKVOPuEPRwV/Uf8fYvKE8xnHz3XZmQd3qpT5CUUmTrXf7RweX1xxVt/rFdumxdP3BbtqpiVRilZFuUZ/sDl7V7azrOx6oUdvXwQPxx6m0FVGLLgi9cnDIZ+DWRhFXw1+4PLlpWXzR3LpfIieUjuCMYFqtm+ETLdk2dEVzQMe1mbEHE8JlGH/hiRpSKI01UufMVbtjEH7a25pFcgVT8UM3LPsMu+gAPHuLfN1E8bdfv1uB3O3PW6xu2+qLdv47zC3cmPvYBBKoENeN3n787ZH+7yJMxuVeXnaiajKi/OTzavB8vf4dNLZ9svIyODozg8XjMyY/vGSgYuZlxKW98ZmJcPyxbazMlY+8+Ll1PjqrQckYjZTsZPDTN1WGdQymcWDyla+a0Zwez4JTVTLOYcH4krfkle745tjiM98NzYf6ctYA7P6MvDx4sz0CiZ23I7GWxXHD68/QTui/IdUXnXsOVp9pFEm5RCE/8KlNHI/nC/ENy0Jp0HlEvSVwkgdv5hr6ulKUf0sP1z838/Fm6ASy/VqDK7CmK5HGw6kJFTq7lLvVQpfjKqySn1Qu8upKluURTr7rRcdPke7rrQ45lvImSWrpTZPqLU0b3prCbU8iVsZBufQrdGcMuy7kX0ryLwNt68DXB0ALH3g27KEeCc5cbW5FmJ2kfWTEh26BdDbXDOsluwlrt4ZYldUjLc+iXYm0vrvOk9c/7Q6/92W+TvI49eoJldCP38xUfmb/hPxbhSmN+ggQuAAAAAElFTkSuQmCC";  
        public MainPage() {  
            InitializeComponent();  
            byte[] Base64Stream = Convert.FromBase64String(base64Image);  
            xfImage.Source = ImageSource.FromStream(() => new MemoryStream(Base64Stream));  
        }  
    }  
}
The longest string shown here is the base 64 is encoded to the image
  • Convert.FromBase64String(base64Image) is used to convert base64 string byte[].
  • ImageSource.FromStream(() => new MemoryStream(Base64Stream)) is used to convert the byte[] to Image Stream and Stream is assigned to Image Control.

When considering how to build iOS and Android applications, many people think that the native languages, Objective-C, Swift, and Java, ...

Xamarin - Introduction Xamarin - Introduction

A blog about android developement

Xamarin


When considering how to build iOS and Android applications, many people think that the native languages, Objective-C, Swift, and Java, are the only choice. However, over the past few years, an entire new ecosystem of platforms for building mobile applications has emerged.

Xamarin is unique in this space by offering a single language – C#, class library, and runtime that works across all three mobile platforms of iOS, Android, and Windows Phone (Windows Phone’s native language is already C#), while still compiling native (non-interpreted) applications that are performant enough even for demanding games. 

Each of these platforms has a different feature set and each varies in its ability to write native applications – that is, applications that compile down to native code and that interop fluently with the underlying Java subsystem. For example, some platforms only allow apps to be built in HTML and JavaScript, whereas some are very low-level and only allow C/C++ code. Some platforms don’t even utilize the native control toolkit.  

In Androidmads, we will not cover the basics of Xamarin App development. But, we will cover the advanced concepts of Xamarin as well as we will assist you, if you find any help with Xamarin Basics. And also we will see about Flutter App development.